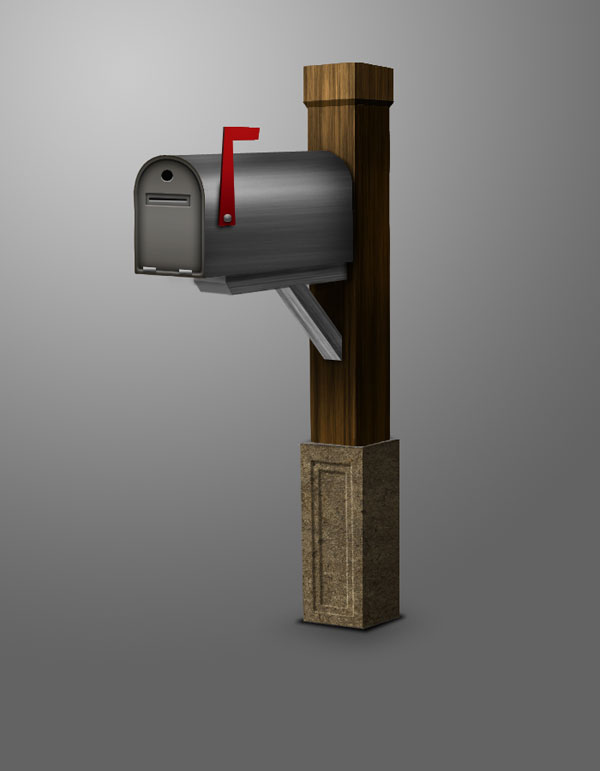
You don’t always need 3D software to create a 3 dimensional graphic. Today we will create a 3D mailbox using several of Photoshop’s tools and techniques. Let’s get started!
Tutorial Assets
The following assets were used during the production of this tutorial
Step 1
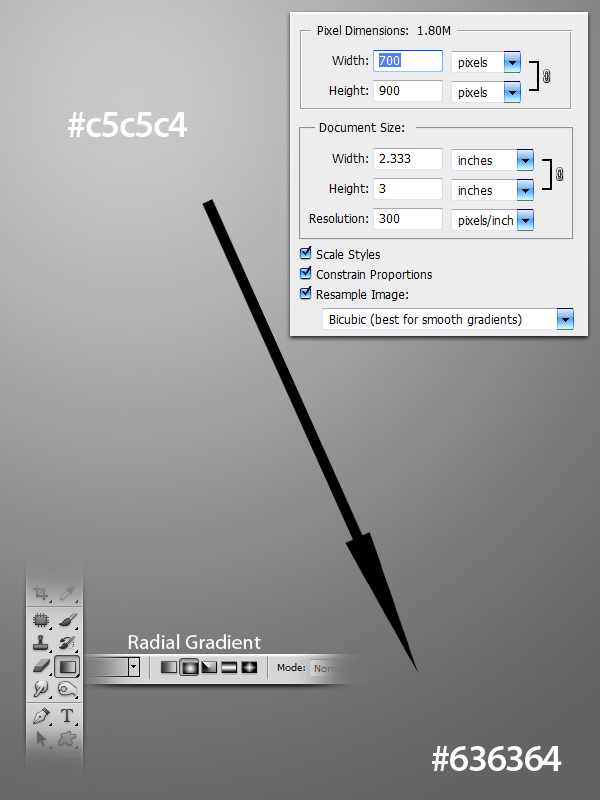
First, start with a new file 700x900px with a resolution of 300ppi. Then, using the Gradient tool (G) set to Radial Gradient, make a nice gradient using the indicated color codes below.
Step 2
For this project I started with a simple sketch of the mailbox in a new layer. Then, using Pen tool (P), I added the perspective lines that will guide us in creating the major shapes of each parts of the mailbox. After defining the perspective guidelines, decrease the opacity level of the layer.

Step 3
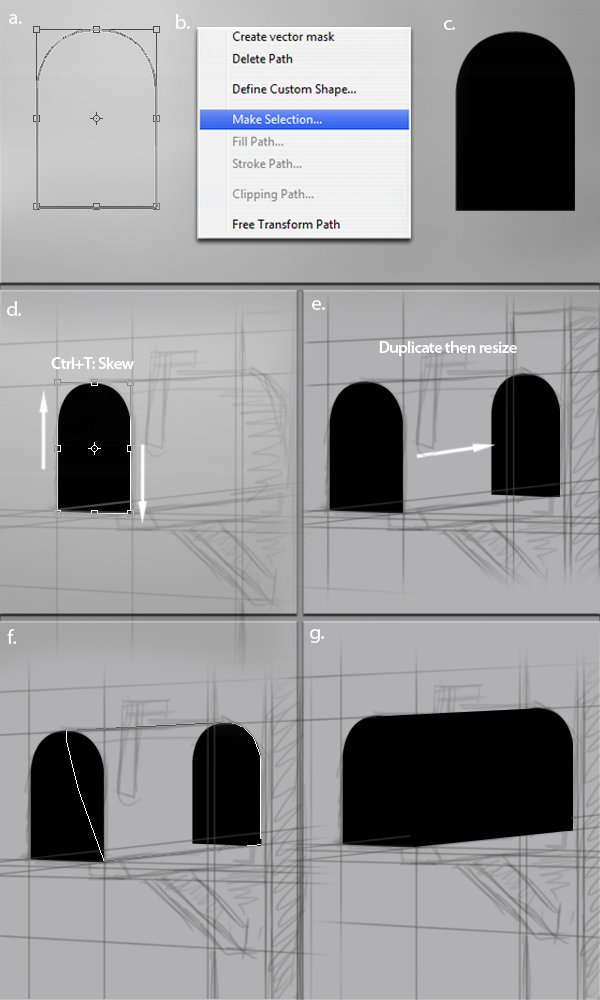
Next, using the Pen tool (P), make a shape just like as shown in a. After defining the shape, right-click and select Make Selection from the dropdown menu, b. Next, using the Paint Bucket tool (G), fill the entire layer with any color you like. At this step we’re only defining the shape of each components, so it’s not necessary for certain color numbers at this point. Then, press Cmd/Ctrl + T to activate the resizing handles. Right-click and select Skew from the dropdown menu. Skew the shape as shown in c making sure to follow the perspective guidelines we made earlier. Next duplicate the layer then resize it a little bit smaller than the first one, e. Next make the shape that will complete the shape of the mailbox. To do this, use the Pen tool (P) to make a shape like as shown in f. Then, press right-click and select the Make Selection from the dropdown menu. Lastly, using the Paint Bucket tool (G), fill the entire layer with the same color number you used for the front and back ends of the mailbox, g. Then merge the back face of the mailbox with the connection and name it as "a-1."
Step 4
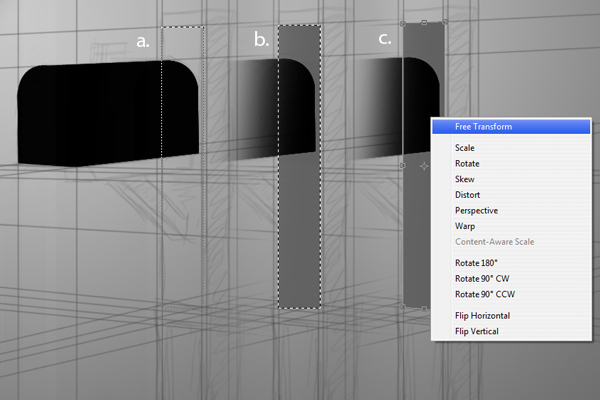
Next are the shapes for the Main Shaft. To do this, start by using the Rectangular Marquee tool (M), a, then color the selected area, with any color using the Paint Bucket tool (G), b. Lastly, hit Cmd/Ctrl + T to activate the resizing handles then select Free Transform from the dropdown menu. Follow the perspective guidelines we’ve made for the correct positioning of the handle points.
Step 5
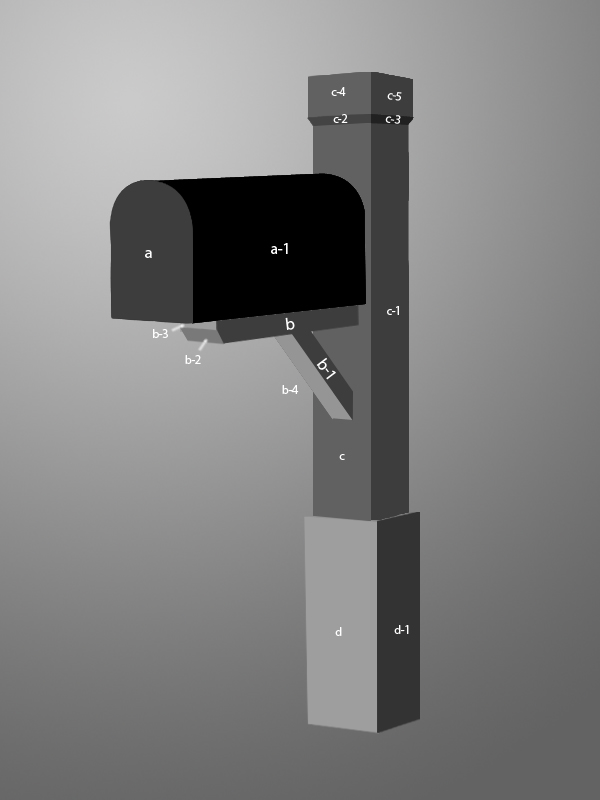
Repeat the steps we’ve done in both steps 3 and 4 for the various shapes of each component to complete the final shape of our mailbox. The letters (a) and their corresponding sublevels (a-1) indicates the right positioning of each layers starting with "a", and its sublevels, as the top layers down to "d", and its sublevels, as the lowest. Same letters means that they are in the same group folder. The letters indicates their layer name.
Step 6
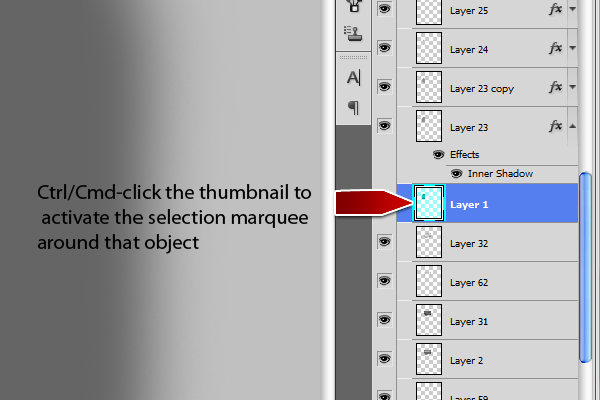
Cmd/Ctrl-clicking the thumbnail of a layer in the Layers Tab, will activate the selection marquee around the object.
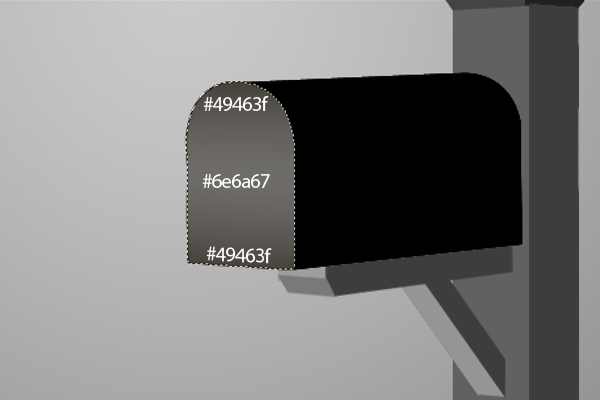
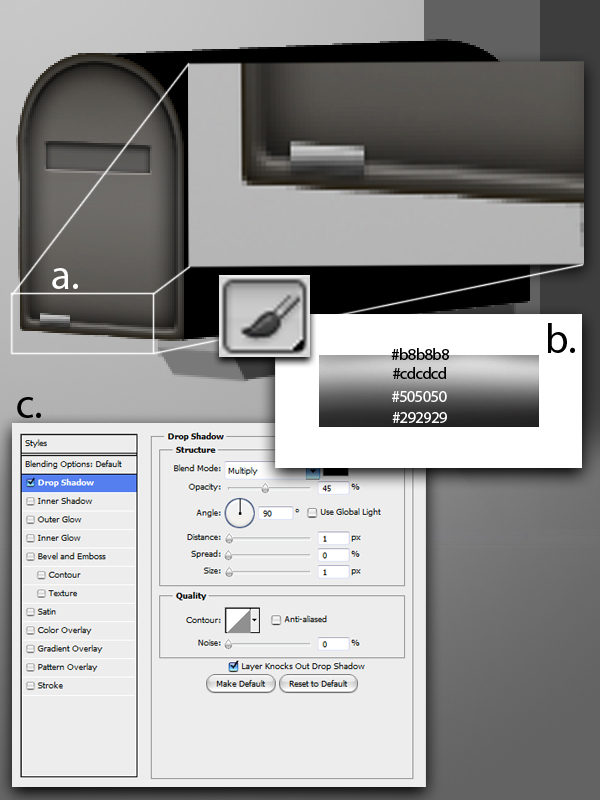
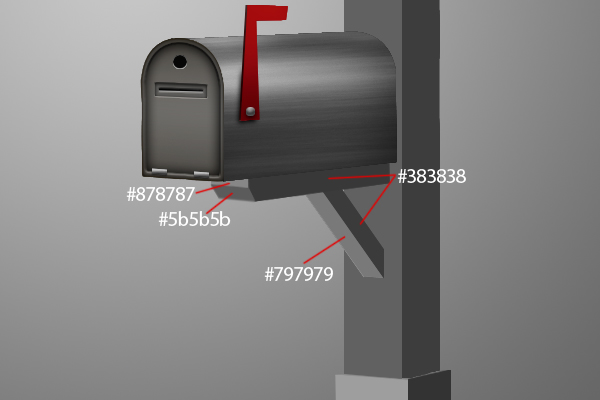
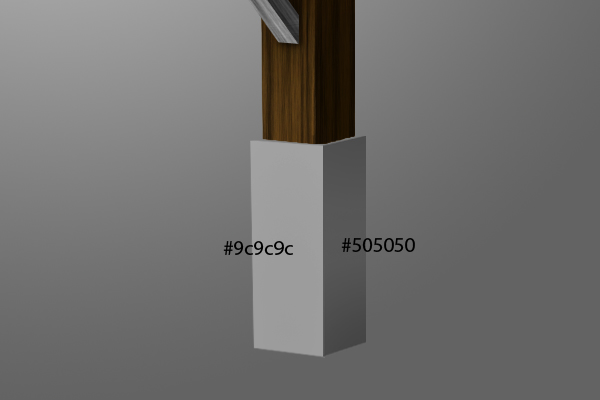
With this technique in hand, we can now color each parts of the mailbox. First add a new layer and name it as “face.” Then, fill the entire selection using the paint bucket tool (G) with color #6e6a67 then use a small soft brush (B) to shade the upper and lower parts of the selection with color #49463f, like as shown below.
Step 7
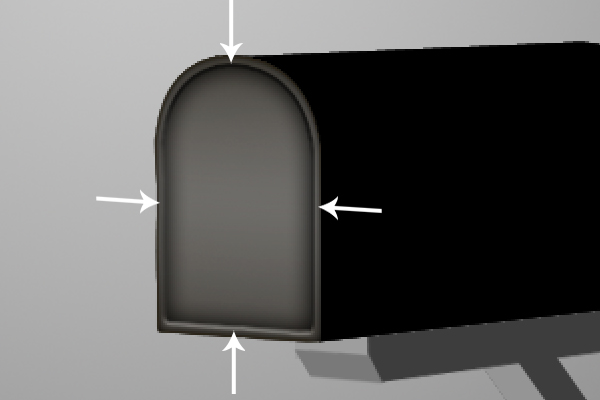
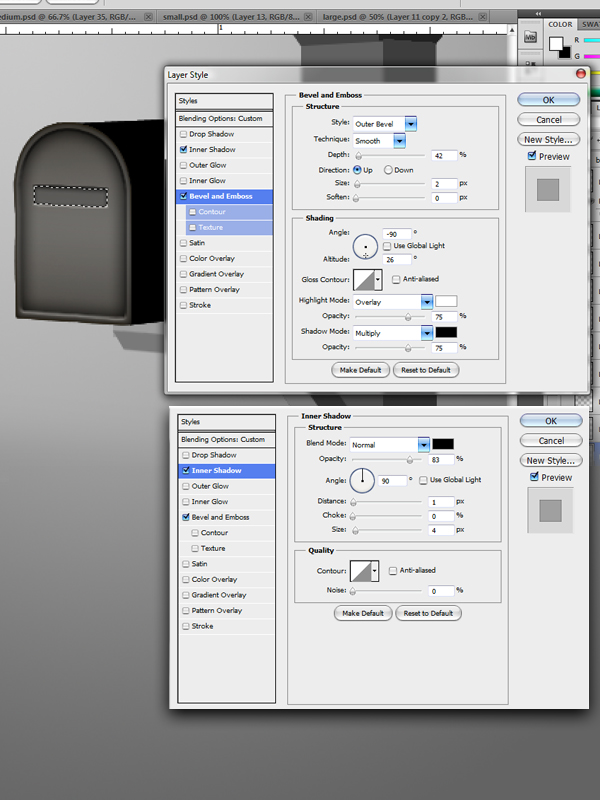
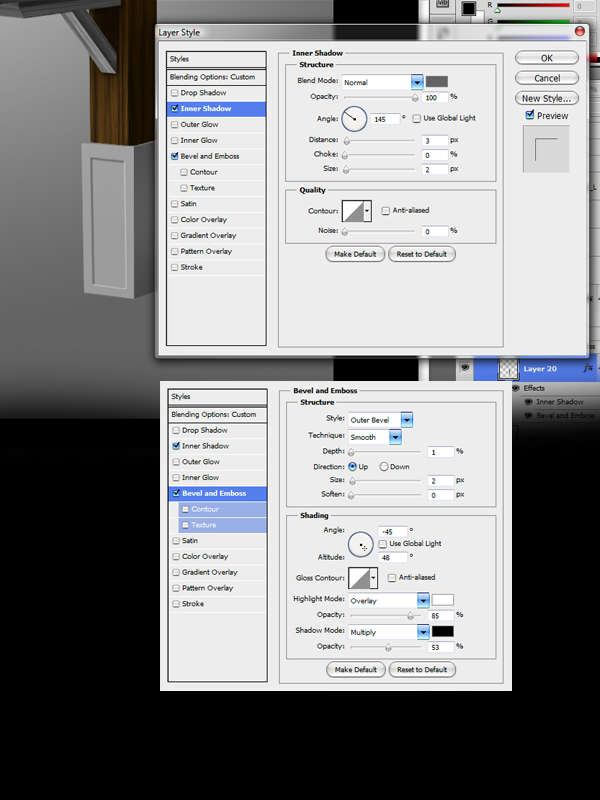
Next add a new layer and name it as "inner shadow." Using the technique we’ve established in Step 6, Cmd/Ctrl-click the thumbnail of the "face" layer to activate the selection marquee around it. Then, using the Paint Bucket tool (G), fill the entire selection with any color then decrease its Fill opacity to 0%. Lastly, follow the indicated layer style below.

Step 8
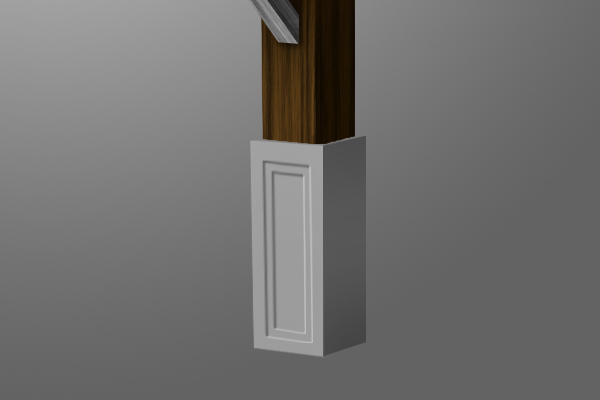
Next step is to duplicate the “inner shadow” by holding down Cmd/Ctrl + J then resizing it a little bit smaller just like as shown below.
Step 9
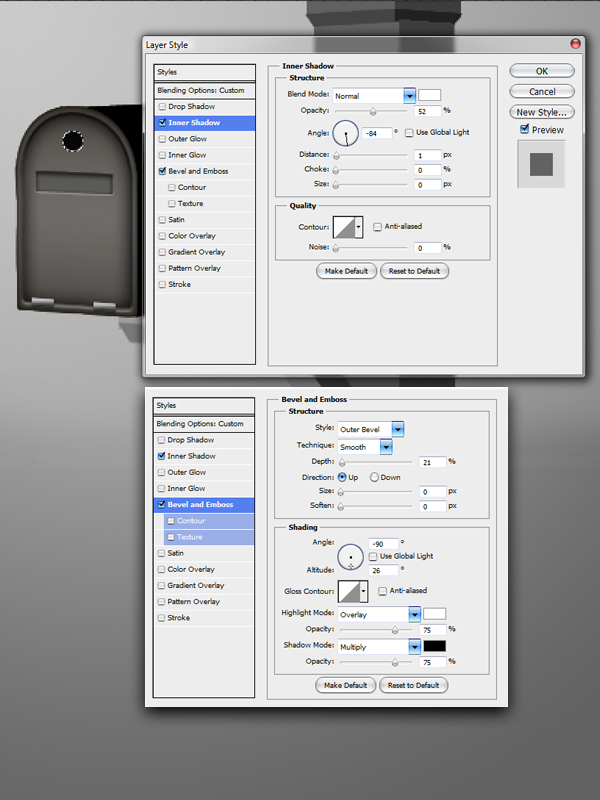
Using the Pen tool (P), make a shape as shown below. After defining the shape, right click and select Make Selection from the dropdown menu then fill it with any color using the Paint Bucket tool (G). Finally, decrease its Opacity level to 0% then follow the layer style indicated below.
Step 10
Add a new layer and name it “hinge.” Using the Rectangular Marquee tool (M), make a rectangle,
Step 11
Next is for the hole that’ll serve as a way to open the mailbox. To do this add a new layer then, using the Elliptical Marquee tool (M), make a circle just like as shown below. Using the Paint Bucket tool (G) fill the entire selection with color #000000 then apply the given layer style indicated below.
Step 12
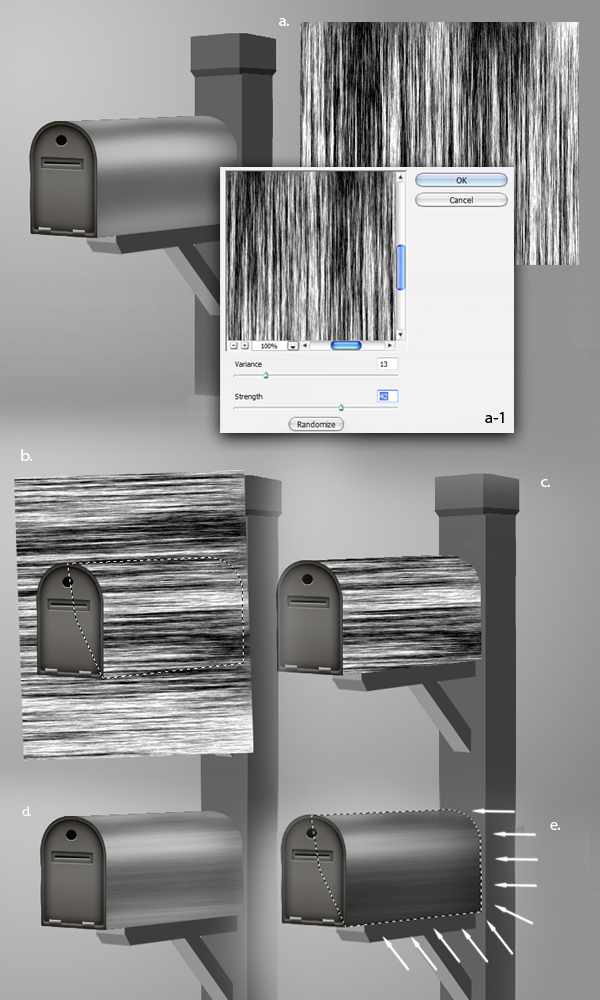
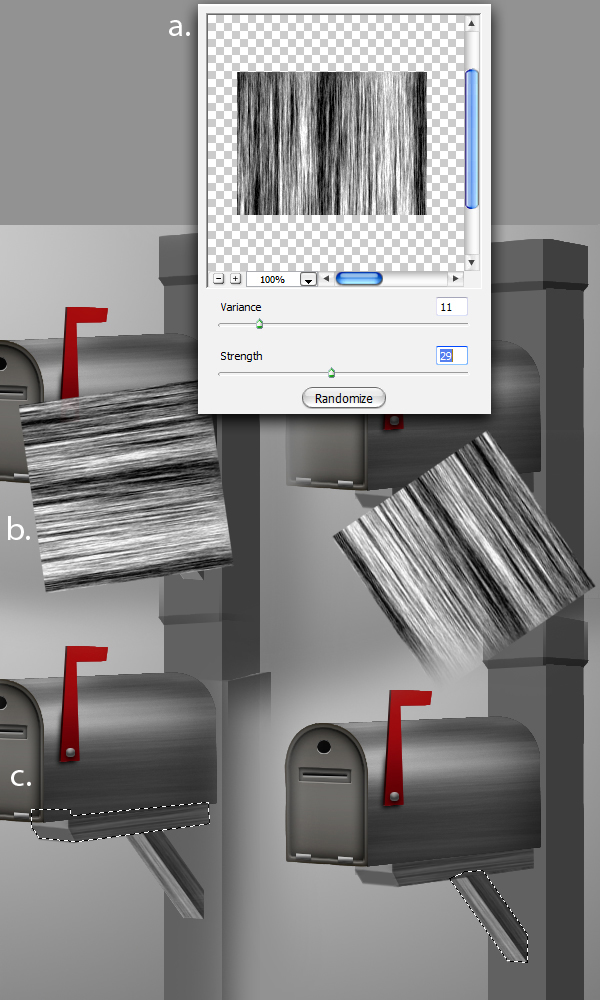
Let’s add the metal texture for the mailbox. First, using the Rectangular Marquee tool, make a rectangle as shown in a then go to Filter > Render > Fibers and change the values with the one indicated in a-1 then name it as "fibers." After that press Cmd/Ctrl + T to activate the resizing handles then rotate it so that the flow of the fibers is the same with the perspective of the box. Then Cmd/Ctrl-click the thumbnail of layer "a-1" to activate the selection marquee around it, b. Hit Cmd/Ctrl + Shift + I to invert the selection then hit delete, c. Make sure prior to hitting delete is that you’re in the "fibers" layer we made earlier. Next, decrease its opacity level to 10%, d. Finally, Cmd/Ctrl-click again the "a-1" layer’s thumbnail to activate the selection marquee around it, then add a new layer then use a soft brush with color #000000 to add some shadings in the areas indicated in e.
Step 13
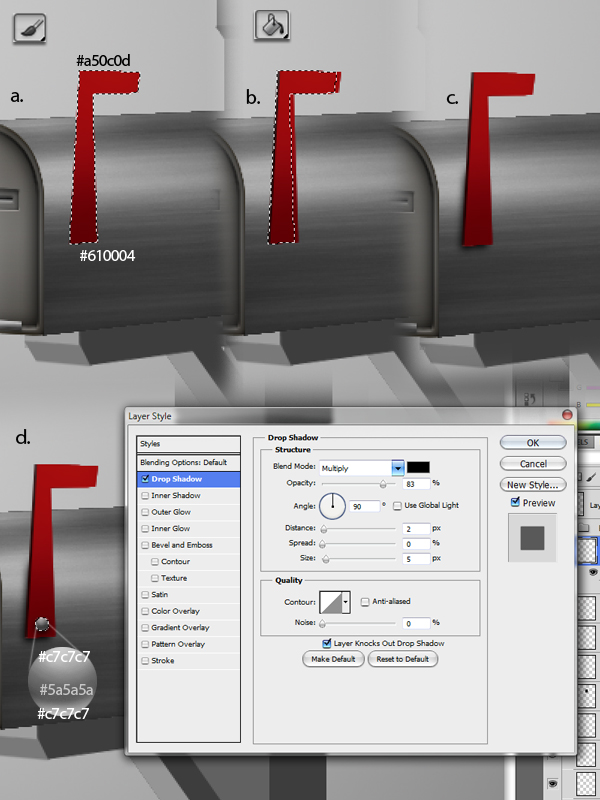
Next step is to add the indicator. First, add a new layer and name it as “indicator”, then using the Pen tool (P), make a shape just like as shown in
Step 14
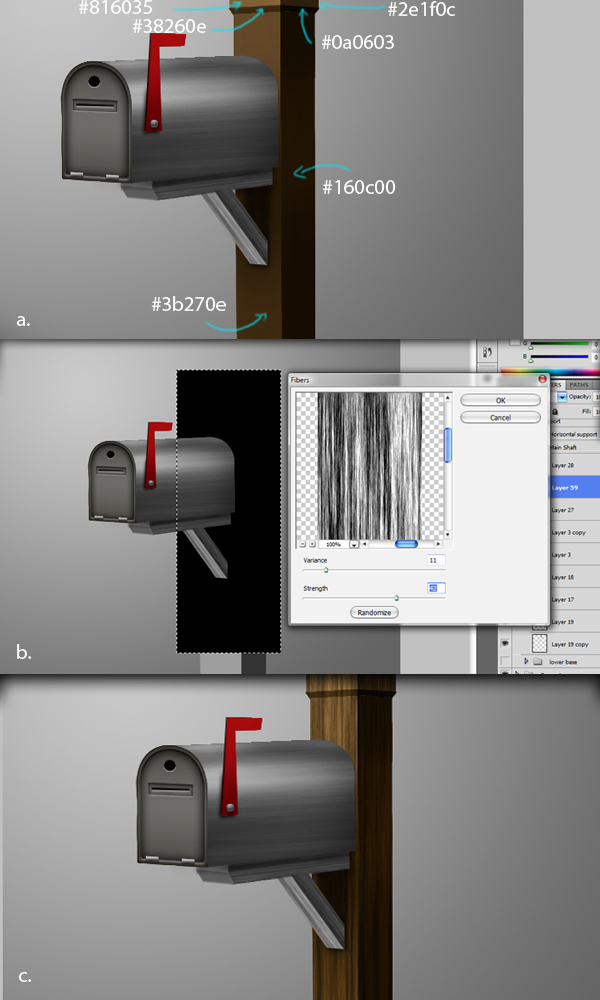
Next is to add the color for the horizontal support of the mailbox. To do this, Cmd/Ctrl-click the thumbnails for each layers in the layers tab to activate the selection marquee of each layers. Then fill each layer selection, using the Paint Bucket tool (G), with the color #’s indicated below.
Step 15
Using the Rectangular Marquee tool (M), make a rectangle then fill the entire selection with color #000000. Next, go to Filter > Render > Fibers and apply the indicated values shown below,
Then, using a small, soft brush with color code #000000, paint some shadows just like as shown below.
Step 16
Cmd/Ctrl-clicking the thumbnail of the layer to activate the selection marquee around the said object. Using the Paint Bucket tool (G) to fill in the activated selection. Using the Brush tool (B) to add some shading. You can now add color for the main shaft using the color numbers indicated in a. Then using the Rectangular marquee tool (M) make a rectangle just right for the entire height of the main shaft. Next, fill the entire selection with color #000000 then go to Filter > Render > Fibers and apply the values indicated in b. Cmd/Ctrl + Shift-click the thumbnails of layers "c", "c-1", "c-2", "c-3", "c-4" and "c-5" to activate the selection marquee around those layers selected. Next, go back to the fibers layer for the main shaft then press Cmd/Ctrl + Shift + I to invert the selection then hit delete. Change its Blend mode to Overlay and decrease its Opacity level to 50%. The final effect should look like as shown in c.
Step 17
Next color the layers “d” and “d-1″ using the coloring technique we did in Step 16 using the color# indicated below.
Step 18
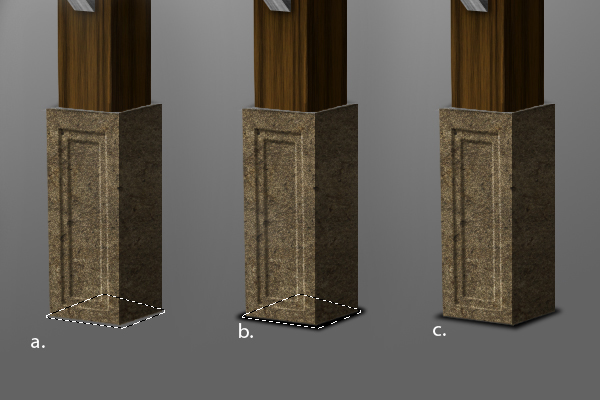
Next using the Pen tool (P) make a rectangular shape just like as shown below. Once you have defined the shape, right-click and select Make Selection from the dropdown menu, then fill it with any color using the Paint Bucket tool (G). Decrease the fill Opacity to 0% then follow the values for the Layer Style as shown below.
Duplicate this layer then resize and skew it (Cmd/Ctrl + T) like as shown below.
Step 19
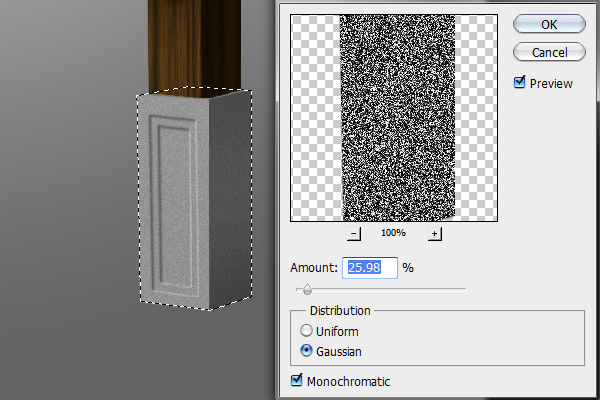
Next add a new layer and name it as “Noise” then using the Pen tool (P) trace the outline of the entire Base then press right-click then select Make Selection from the dropdown menu. Fill the selection with color #000000 then go to Filter > Noise > Add Noise and change the values as indicated below. Lastly, change its Blend Mode to Multiply and decrease its Opacity level to 10%.
Step 20
Next, add a new layer and name it as “greenish tint.” Cmd/Ctrl-click the “Noise” layer’s thumbnail to activate the selection marquee around the base then fill the selection with color #49463f. Lastly, change the Blend mode to Overlay.

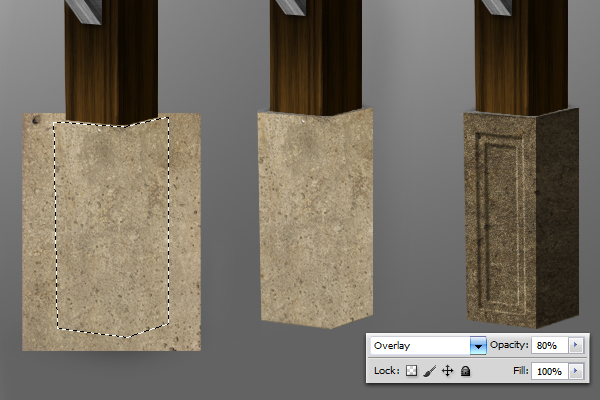
Step 21
Open the Rock.jpg texture then resize it just right for the size of the base. Next, Cmd/Ctrl-click the “greenish tint” layer’s thumbnail to activate the selection marquee around the base. Next, press Cmd/Ctrl + Shift + I to invert the selection then hit delete. Finally, change its Blend mode to Overlay and decrease its Opacity level to 80%.
Step 22
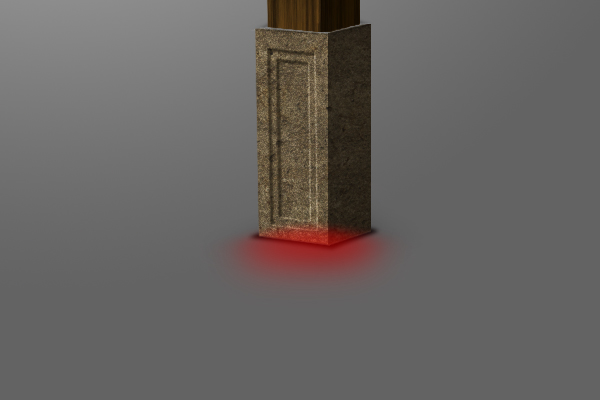
For the last step, use the Polygonal Lasso tool (L) to make a selection like as shown in
Add some more shadows using a soft brush with an Opacity of 50% in the red area indicated below.
Conclusion
That’s it. We’re done! Hope you had fun!
Source: http://feedproxy.google.com/~r/psdtuts/~3/SvR_XtQ4ic4/
bathroom design tips bathroom design tool bathroom designer bathroom designing bathroom designs
No comments:
Post a Comment