Our universe is vast. So vast, in fact, that astronomers don’t measure its size in meters or miles but by explaining how long it would take to travel a certain distance at the speed of light. Light travels approximately 186,282 miles per second. This means that in a one year a person traveling at the speed of light would travel about 6 trillion miles. In today’s tutorial, we will be concluding our cosmos series by demonstrating how to create a green planet, a setting sun, and a space ship which has traveled several million light years in Photoshop.
Today’s tutorial is part of a 4-part series depicting the journey of the inhabitance of a dying world that must travel into the unknown to find a new world to call home. In this series, we will explore the cosmos from the perspective of this fictional civilization making their way through the universe and will demonstrate the techniques that you can use in Photoshop to depict your own cosmic scenery. In addition to written content, this tutorial also includes about 90 minutes of video instruction to help you along the way. So what are you waiting for? Let’s get started!
Tutorial Assets
The following assets were used during the production of this tutorial.
Step 1 – Ship Sketch and Base Shape
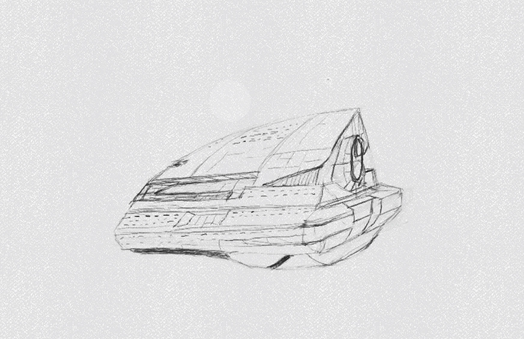
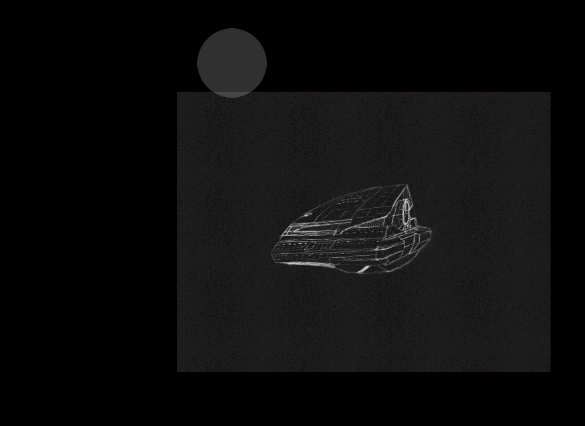
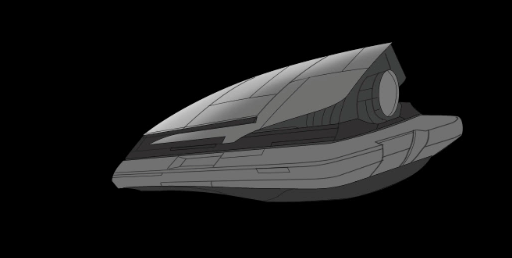
Welcome to part four of this series, today will be mostly about the ship, we will make our ship with Photoshop we will not use any 3d elements as we have kept all of this tut series, we will detail, texture, and blend it all with Photoshop. It all begins with a sketch, I made the sketch shown here more or less following the shape we have used throughout this story. I used to sketch on paper, yet when zbrush 4 came up I found a sexy behind the scenes app included with it, called "Paintstop" which is what I use right now, its so impressively like paper and pencil it is amazing. In any way you can sketch on paper and scan it, or even use Photoshop if you are comfortable with it.

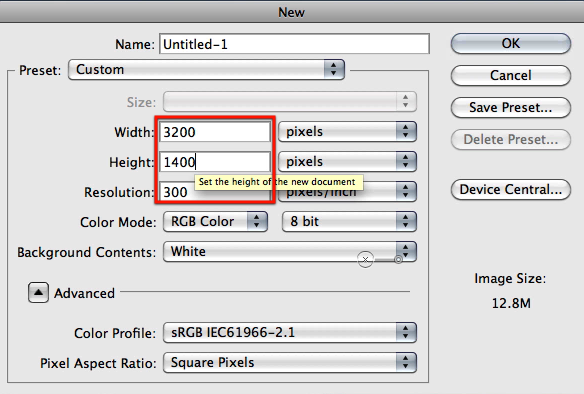
Now let’s go to Photoshop and create our document for this image as shown here and fill the canvas with black.
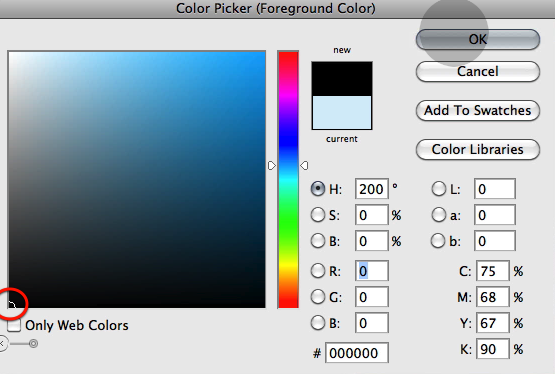
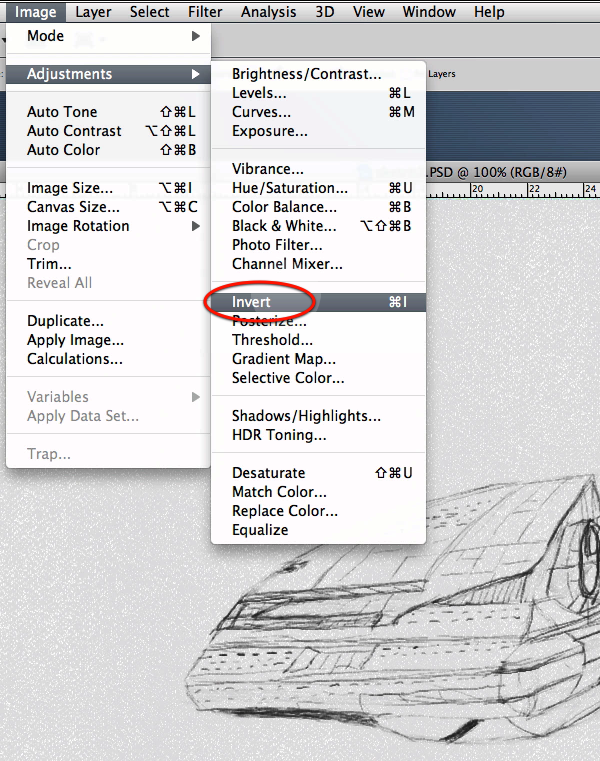
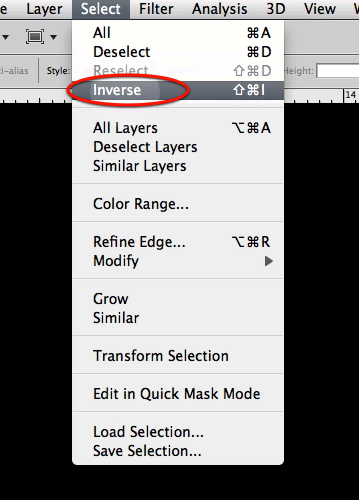
Then import your scan or any other media where you did the sketch and paste it on to a new layer. Then invert the image so you have white defined lines over black.
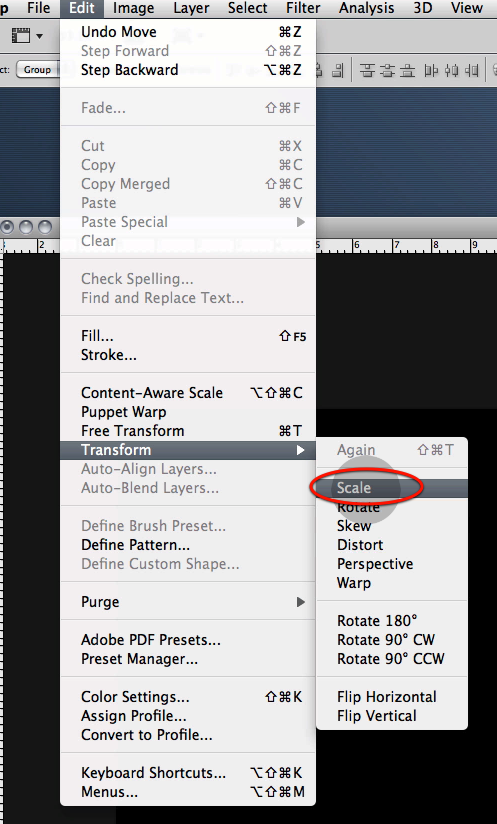
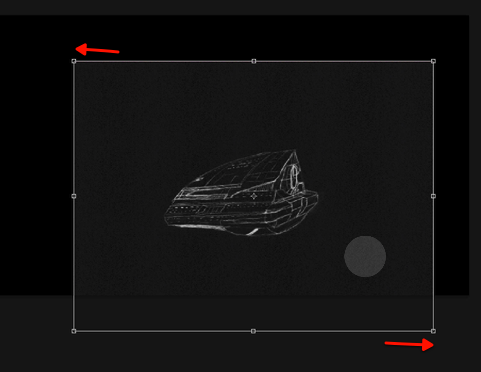
Now scale the size of the ship to what you want it to end up like.
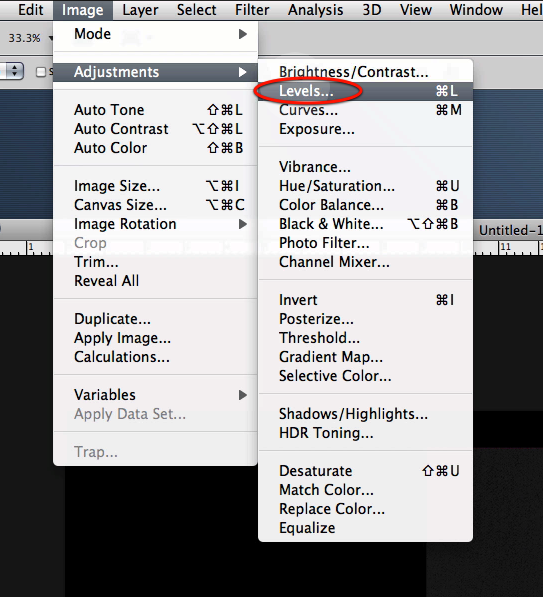
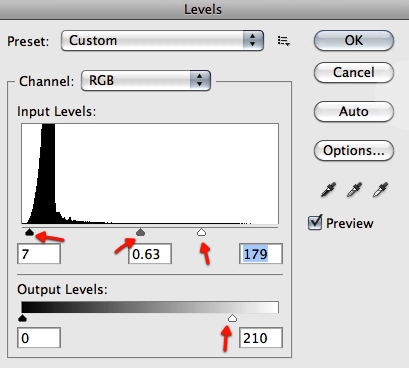
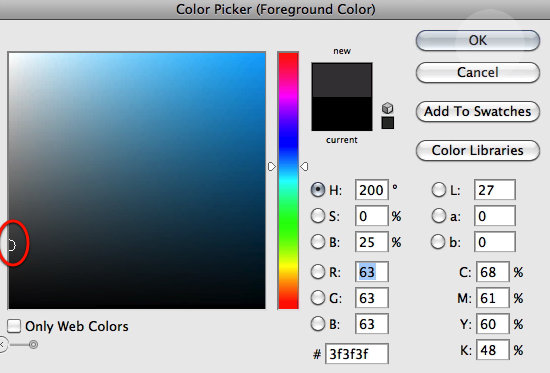
Now let’s adjust the levels for it so that the black background almost disappears and doesn’t bother our work.
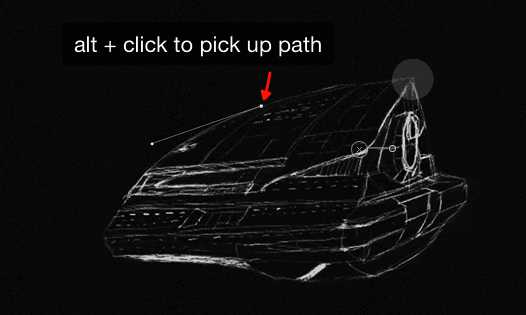
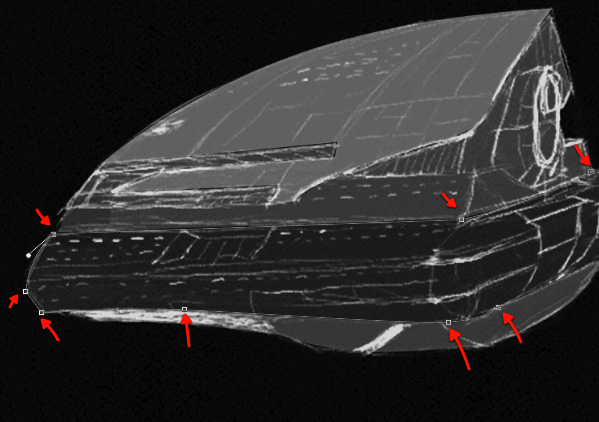
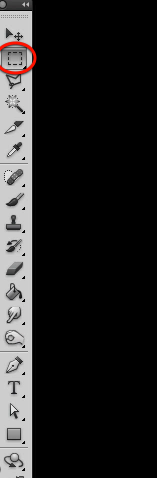
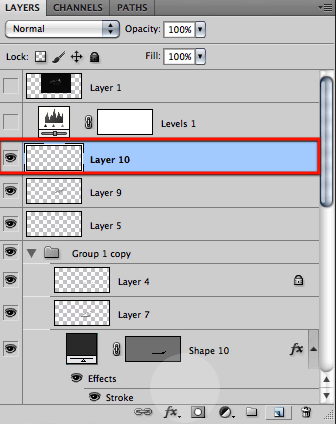
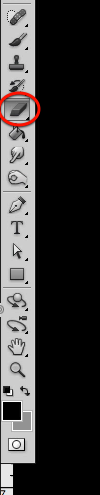
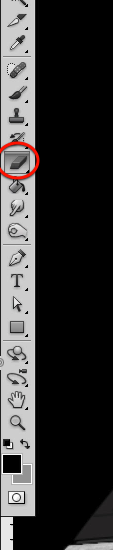
Now the first thing we will do its to trace the whole shape of the ship, a base for the rest of our work. So select the pen tool and set it up as shown below.


Now I will not go into detail on using the pen tool there are brilliant tuts here where you can learn how to pick up paths, use the handles for each point etc. I’m sure most of you already know how to trace a shape with it.
Once you have traced all of the ships contour just right click and make a selection as shown here
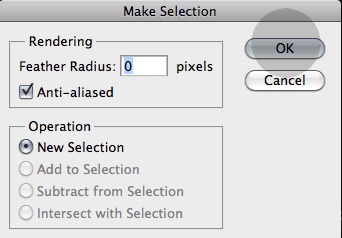
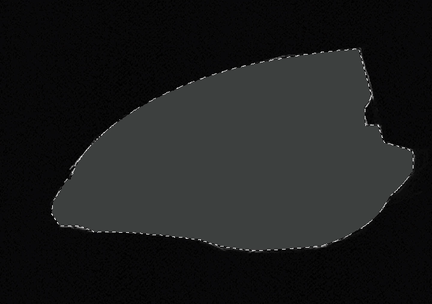
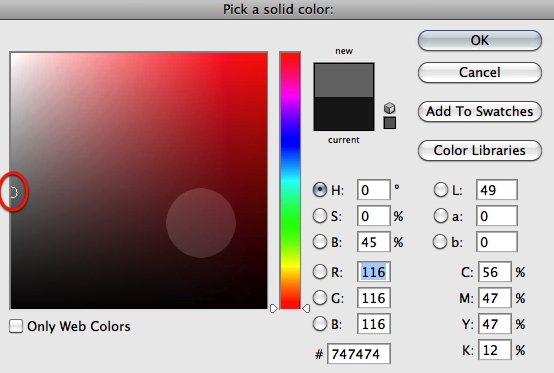
Now just fill it with a dark gray in a new layer.

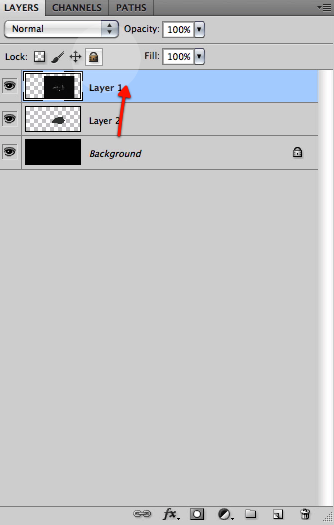
You should end up with something like shown here. Now we will need to drag our sketch to the top so we can keep following it to trace our shapes.
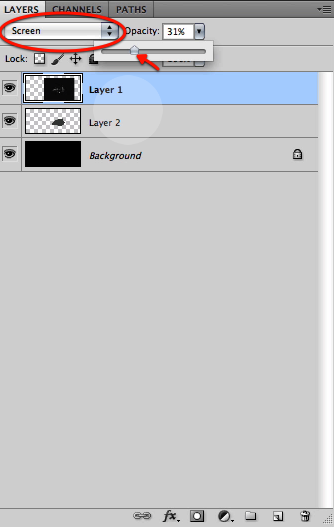
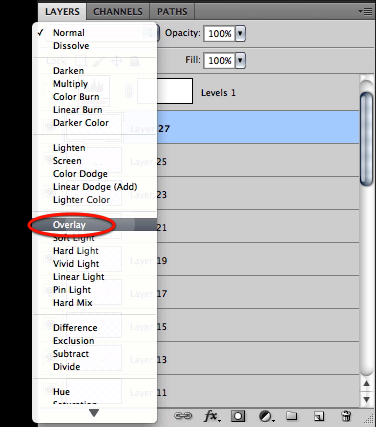
Now set it up as screen and reduce the opacity a bit so it doesn’t show too much.
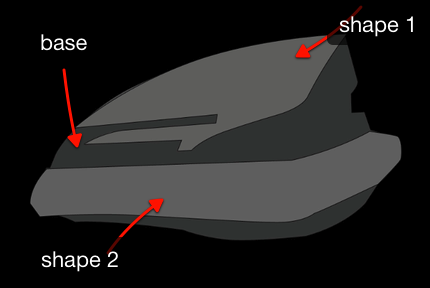
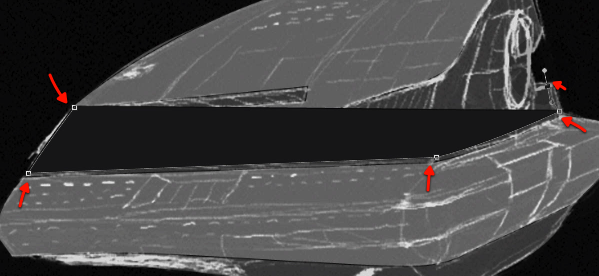
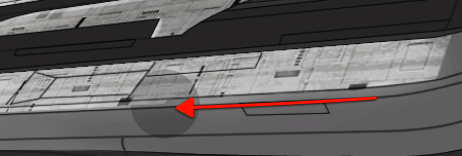
Let’s go back to the pen tool now and change the setting shown here and start building the different section shapes.


Let’s now go on to the next section shown here, and use the same medium gray as the shape color.
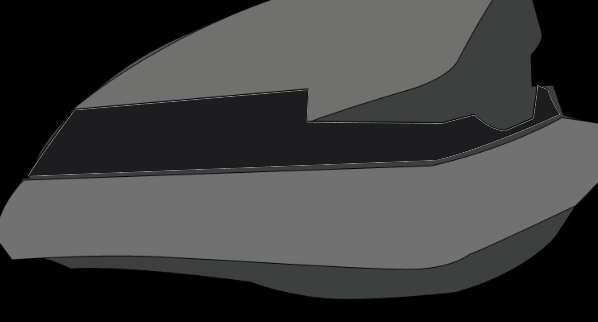
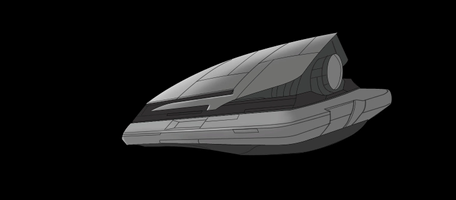
So to avoid confusion here is what we have so far without the sketch, you can see where we are going with it, we will trace every section so we have several parts to use when detailing. Of course if you are an ace with the brush tool, you can paint instead of using the pen, this is an easy to follow workflow that renders precise smooth shapes fast, and most important can be modified if needed.
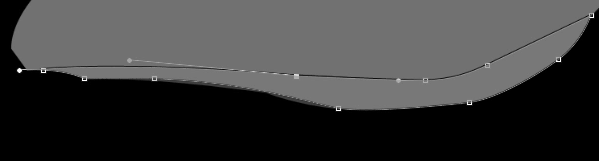
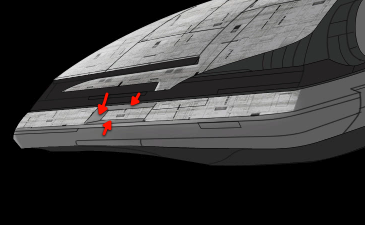
Now let’s continue with the next section shown here.
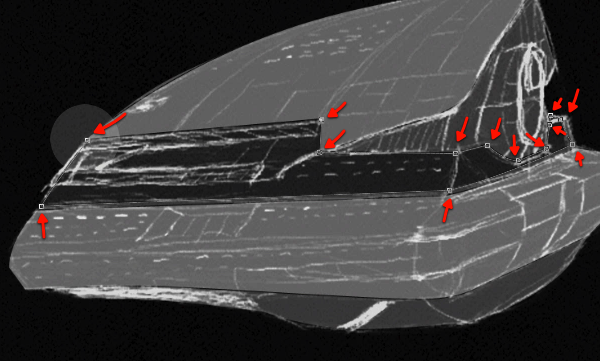
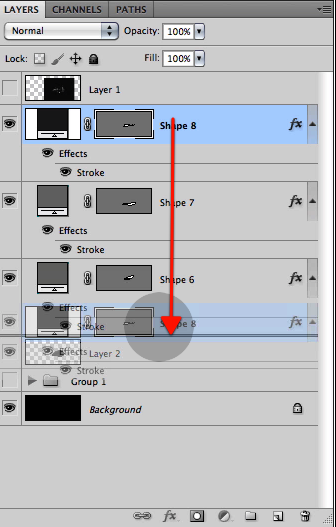
Now the part we just traced is below the others so let’s drag its layer down.
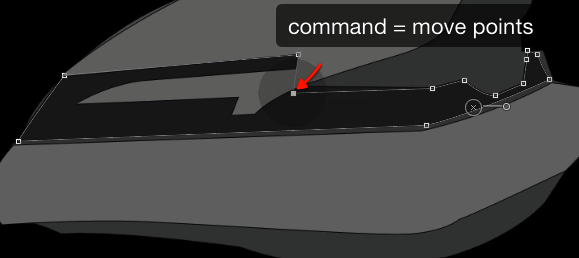
If needed you can adjust the points as needed.
Let’s keep on going for each section, while checking the sketch now and then to be sure we are on the correct path.
We can also change the shades of gray to adjust to our sketch vision, and this is what we have so far.
Now that we have all big shapes in place we will ad the sketch lines by also using the pen tool to trace them, so for this let’s make a new layer on top.
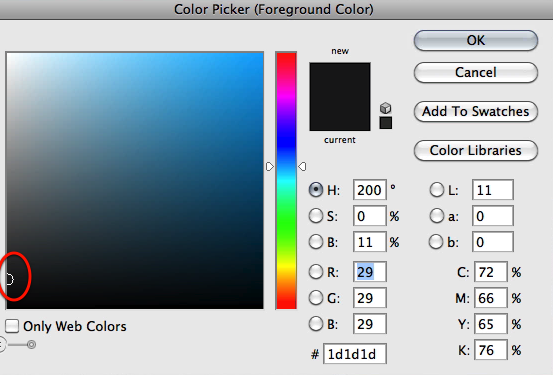
Now for tracing the lines we have to change the pen tool a bit and select a very small defined brush plus a dark gray color.


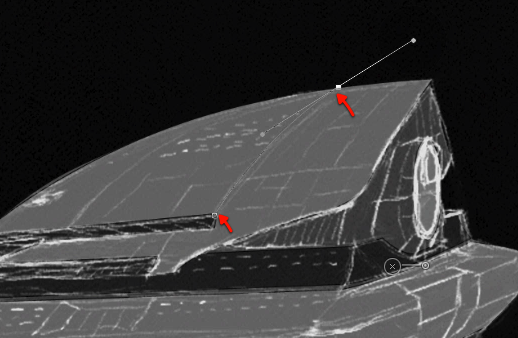
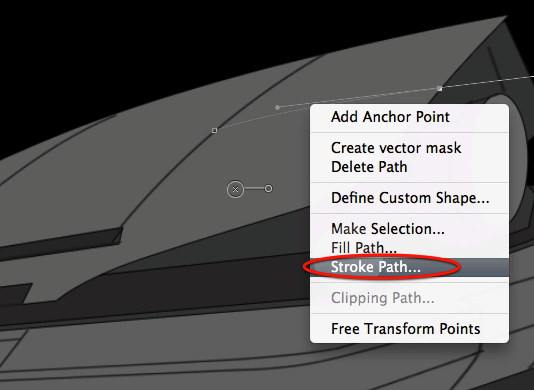
Now we will be shaping lines, not shapes; so trace the line based on the sketch from start to finish.
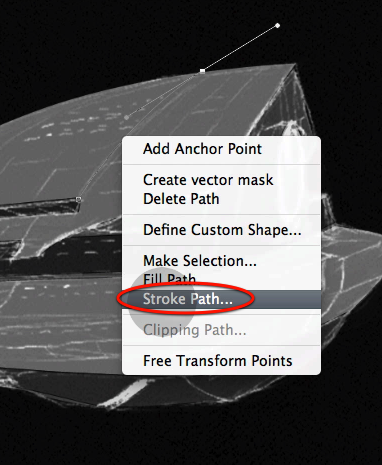
As soon as you have the line finished before you do another one, right click on the path and select stroke path and you start getting nice defined lines of the thickness of the selected brush.
Easy enough just continue with all the main lines from the sketch as shown here.

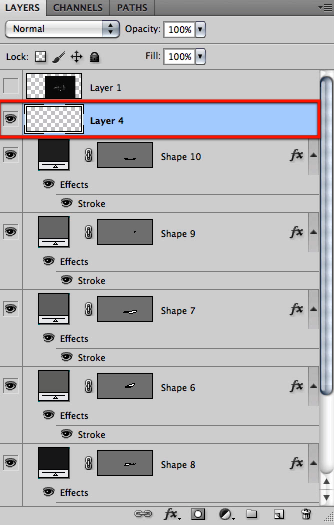
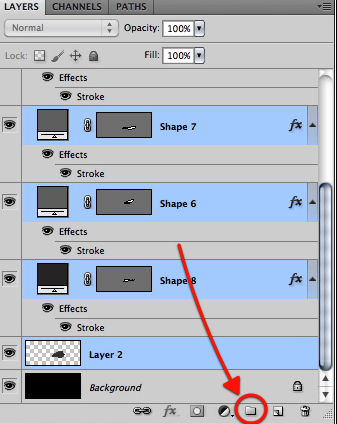
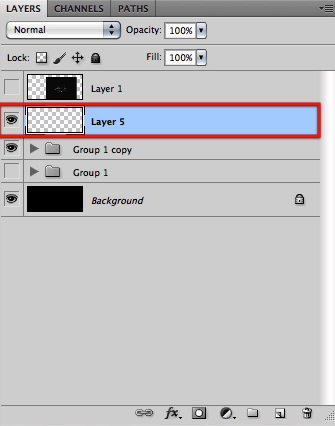
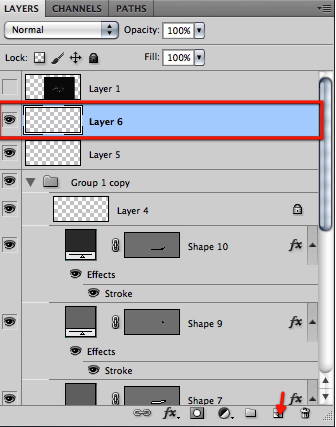
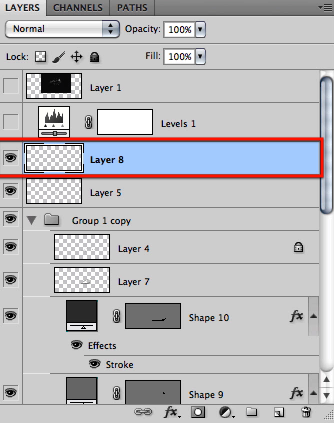
Let’s now grab all the layers we have been working on and drag them to the group/folder icon so we have a new group.
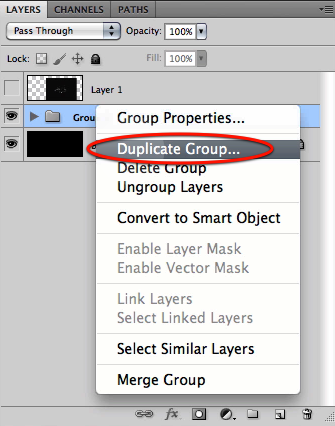
Next on let’s duplicate the whole group just to be safe, and hide the original group

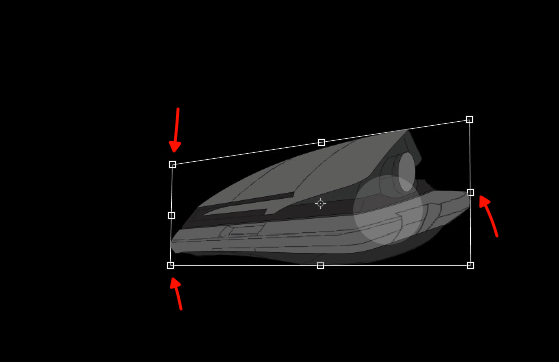
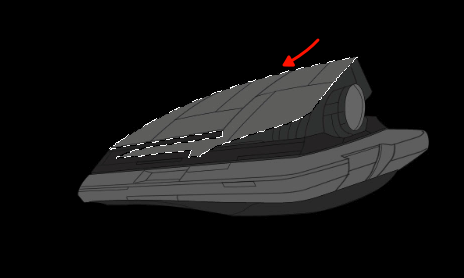
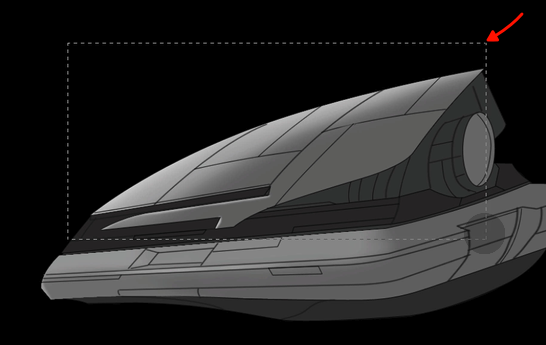
Now at this point I decided to change the perspective just a bit, to make the look of the ship more lengthy and pointing into our scene.
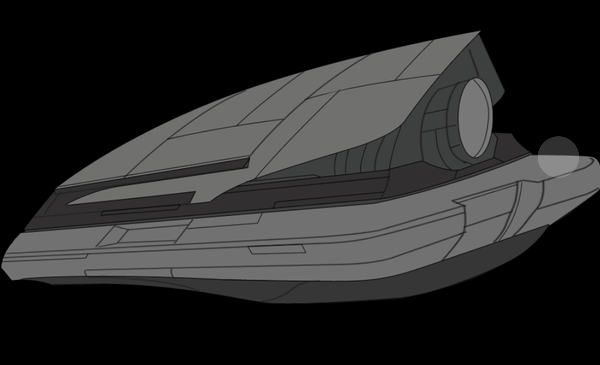
Now let’s continue with the rest of the secondary lines in a new layer as we did before, tracing the lines and then selecting stroke path.
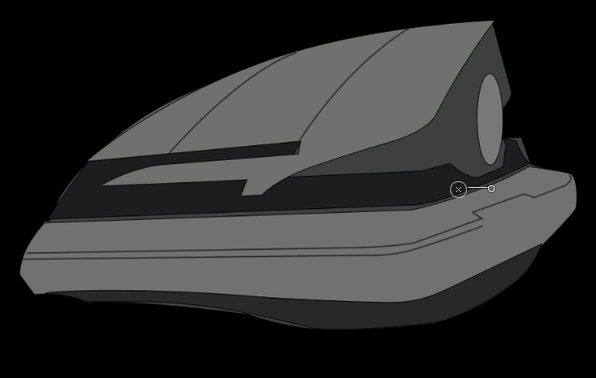
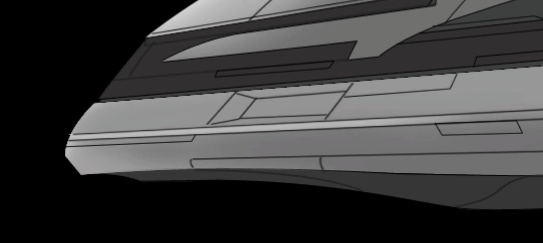
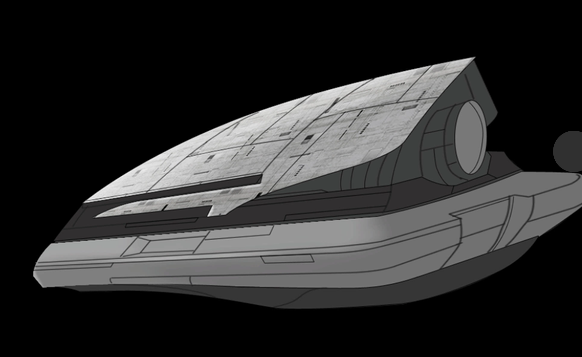
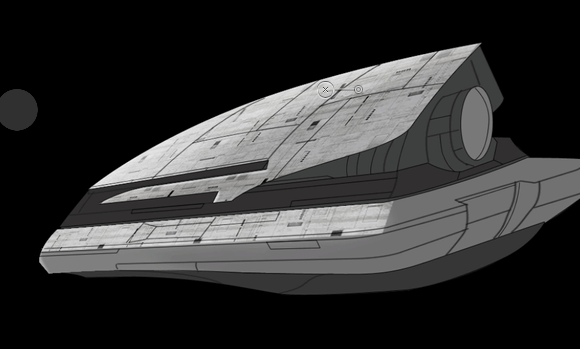
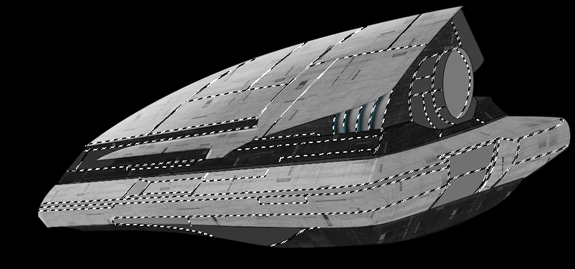
At the end of this stage here is what you should have; now we have a strong traced shape where we can start texturing and detailing.
Step 2 – Base Shading and Texturing
We now have all our shapes in place, yet they all need highlights and texturing, and for this we will follow a very easy process to texture each of these sections that you can use not only in this project but the workflow is good for many purposes. For starters we need a new layer so go ahead and create one as shown here.
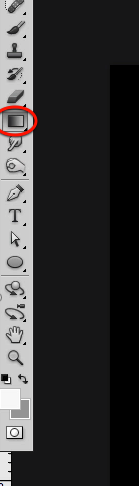
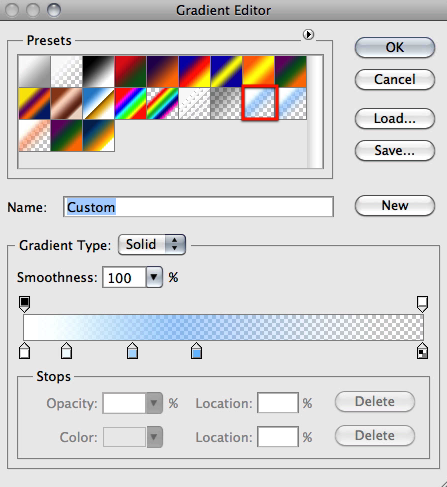
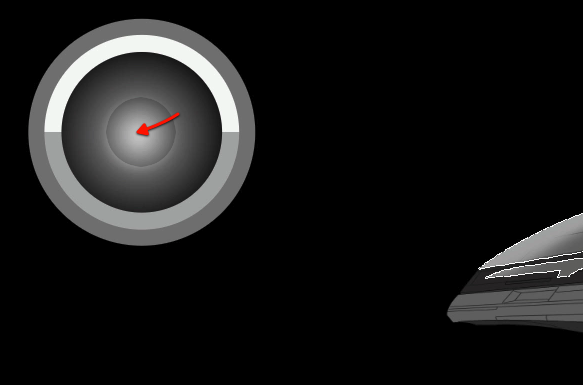
In this layer we will create a light source just to guide us through the highlights and to provide us with various shades of gray we can pick from. This is not our final light source, we will just be using it as a guide yet we have to decide where the final light source will be positioned. Grab the gradient tool and the gradient I have prepared for you and we have used in other parts of this series.
And drag a light source where you want your final source to be placed.
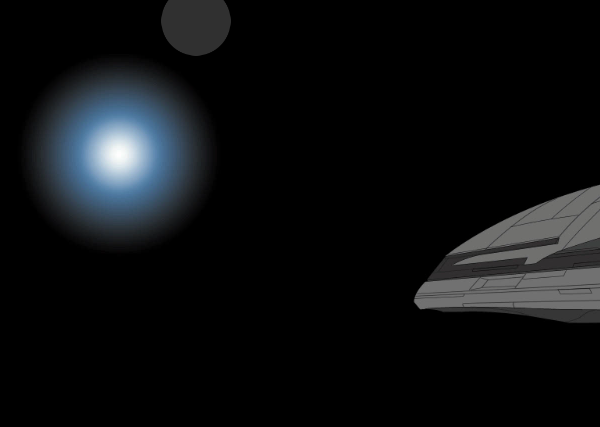
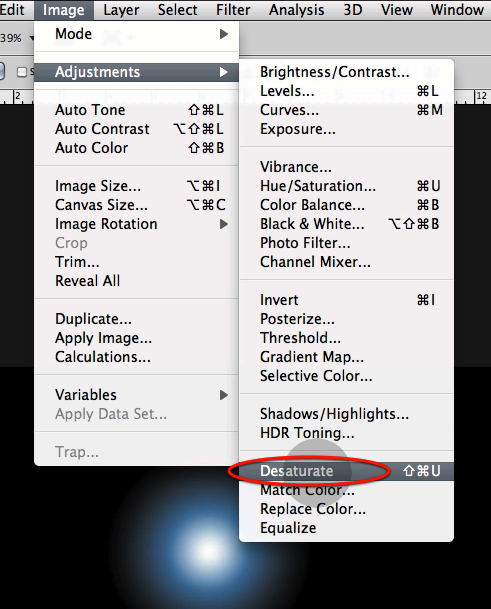
For now we don’t need any color information we just need shades of gray so desaturate this layer.
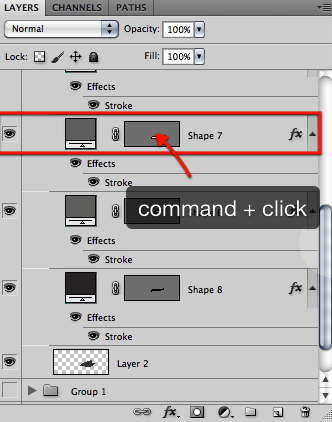
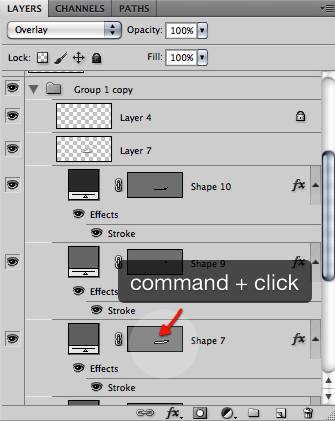
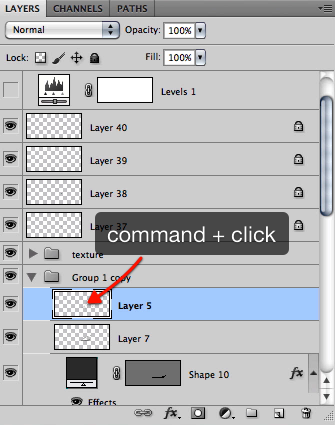
OK now we need another layer to start painting in the highlighted sections to our shapes; so create a new one and make a quick selection of our forward shape by hitting Command/Ctrl + click on the shape thumbnail.

Once you have your quick selection as shown here, pick up a light gray from our light source as shown below.
Then just grab a big soft brush and paint in some delicate highlight considering where the light source is coming from.
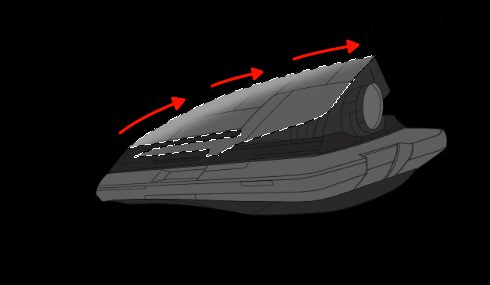
And now select a brighter color and paint in a stronger highlight right at the border. Then we will drag the layer down inside the group just on top the main shapes.
This let’s our lines layers to be on top the shading we just painted.
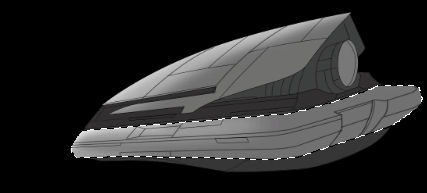
Now let’s select another section of our main shapes and repeat the process, once again making a quick selection from the shape thumbnail.

And painting in with lighter grays sampled from the light source. Again taking into consideration where the light is coming from.
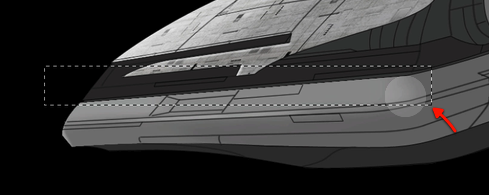
Now not all sections have a shape we can pick up from so let’s see how to do this. Select your polygonal lasso tool and define a thin selection as shown below.

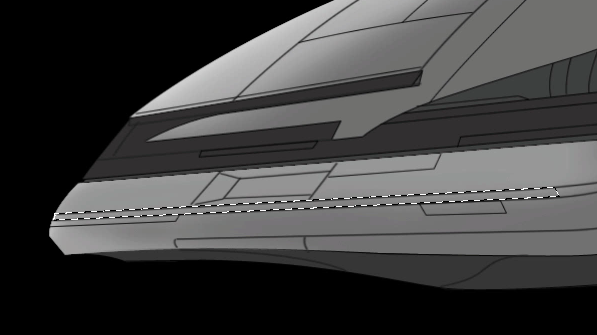
And use that selection in the same fashion as before to indicate a slightly brighter highlight.
Now continue doing this on all medium gray sections as shown here, remember this is just the basic highlight work.
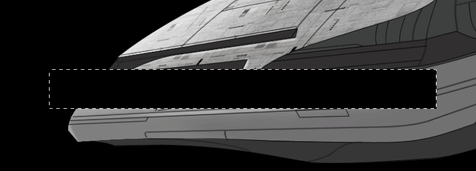
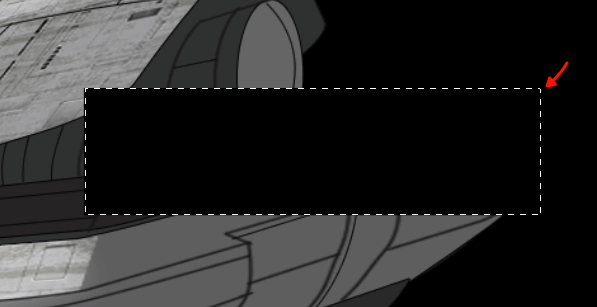
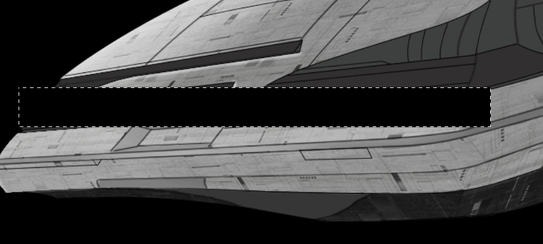
OK now we will go on to the texturing for our sections, so create a new layer and grab your rectangular selection tool.
Define a selection about the size that will cover the section that you want to texture first and just fill it with black.

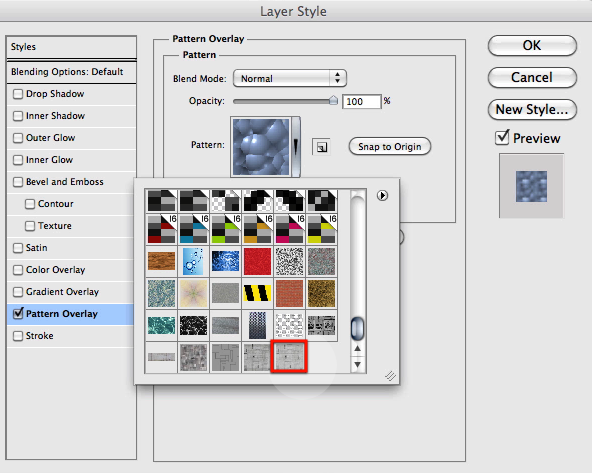
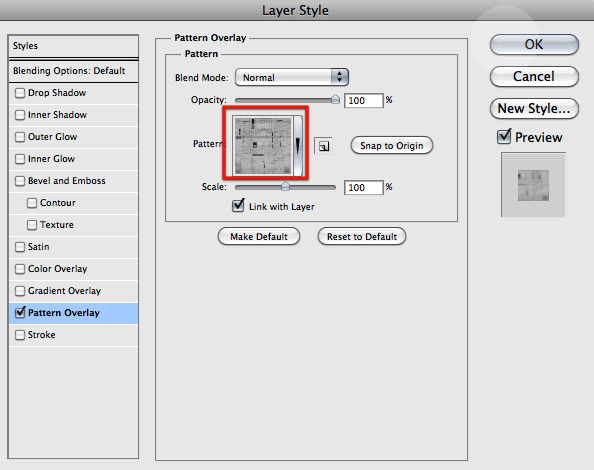
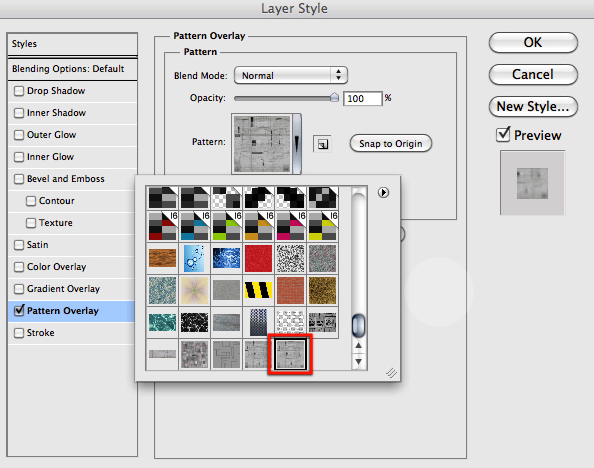
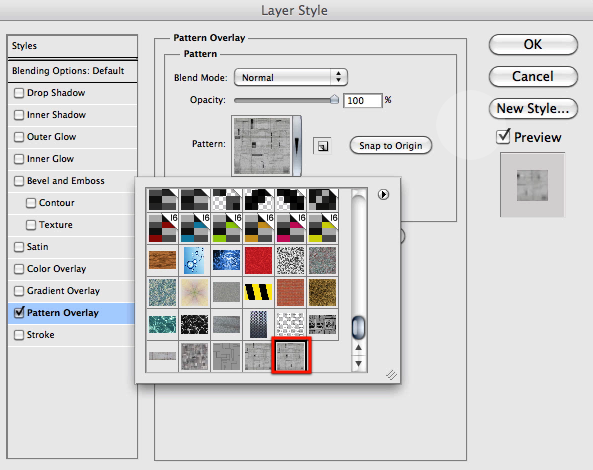
Now through the layer style, apply a pattern overlay shown here that I have prepared for you of a hull texture, there are many great textures about and other great tutorials on how to make a texture for this, yet to avoid texture providers from crying out if we use their textures, I have made one that you can freely use in whatever you want.
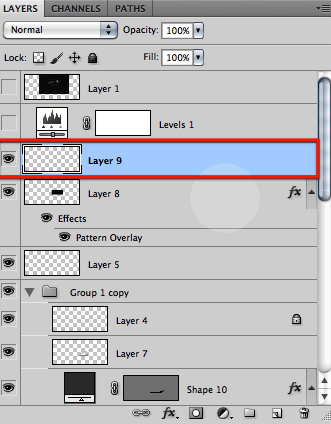
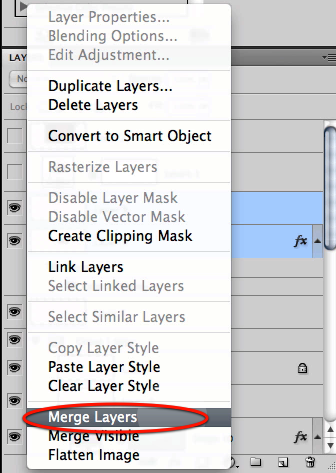
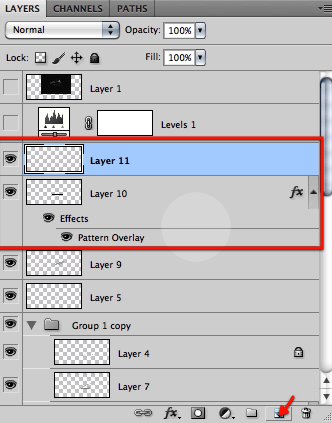
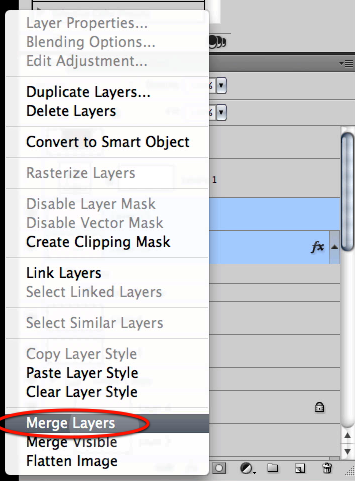
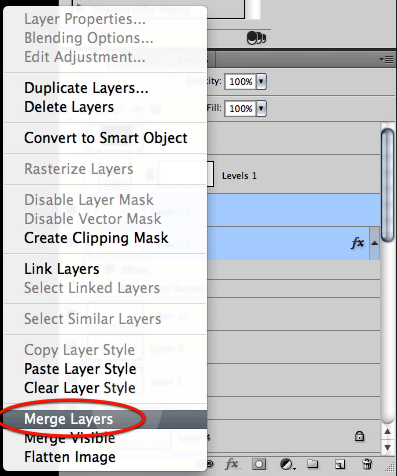
Now for us to be able to manipulate this texture we need to flatten the style, so let’s make a new layer and then merge both the styled layer and this to create a single layer that has the texture applied.
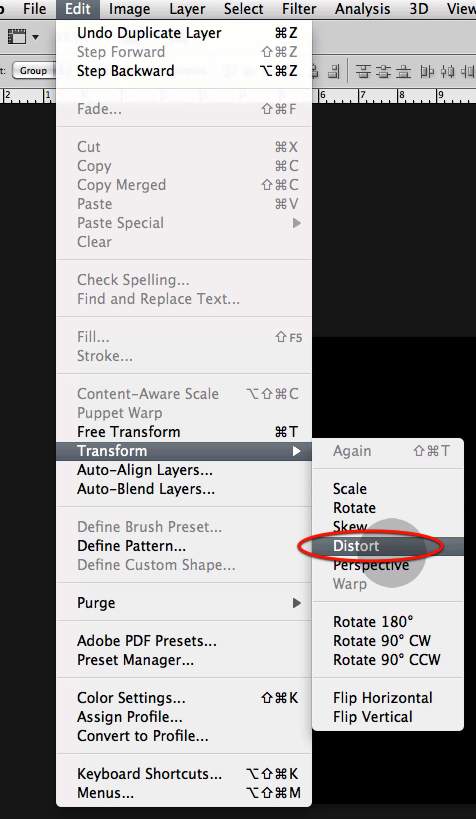
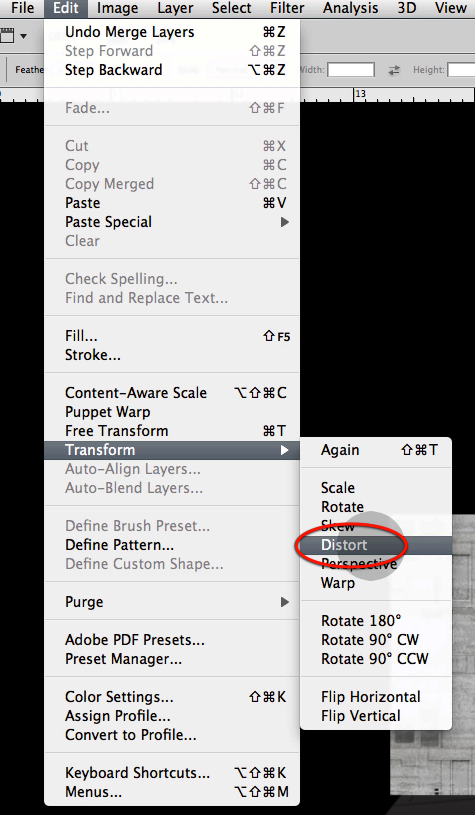
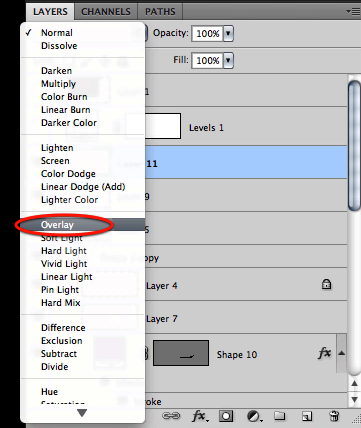
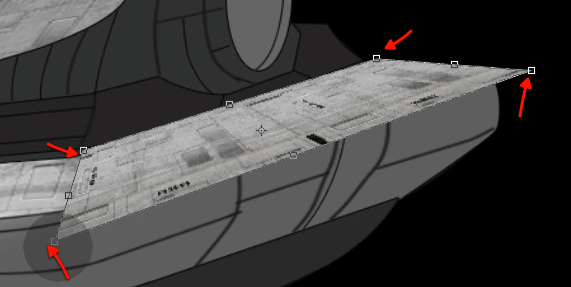
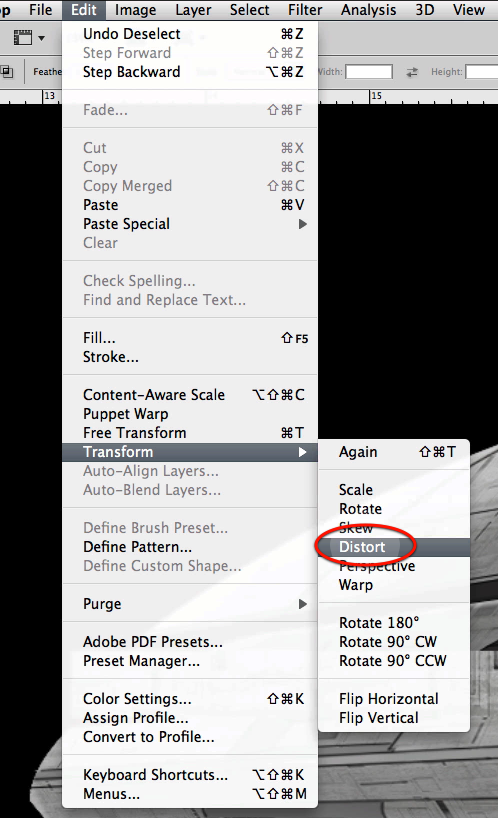
Now select the distort Command/Ctrl.
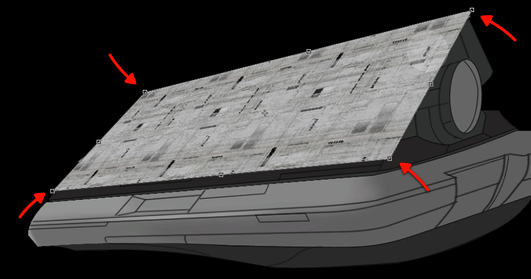
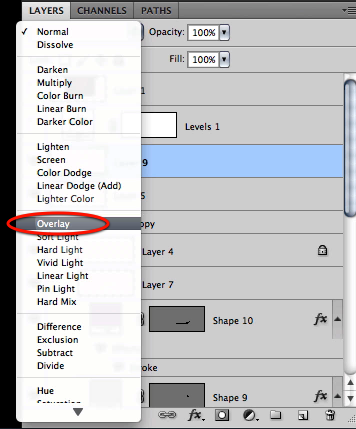
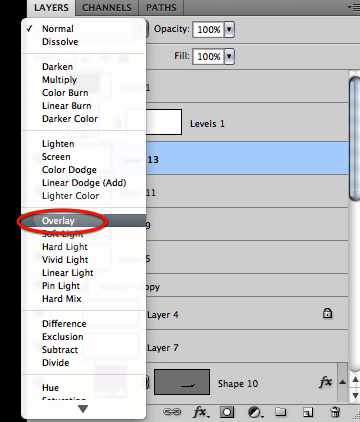
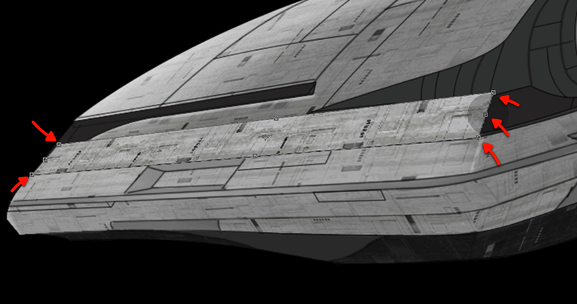
Then distort the texture into perspective as shown here following the ship shape, and then setting up the layer mode to overlay.
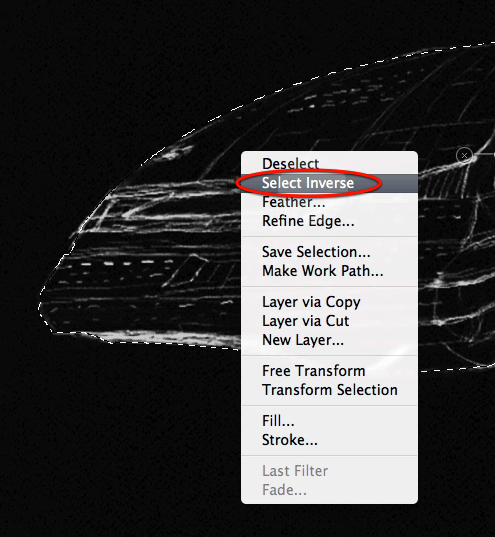
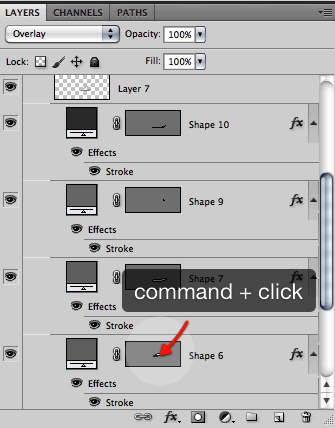
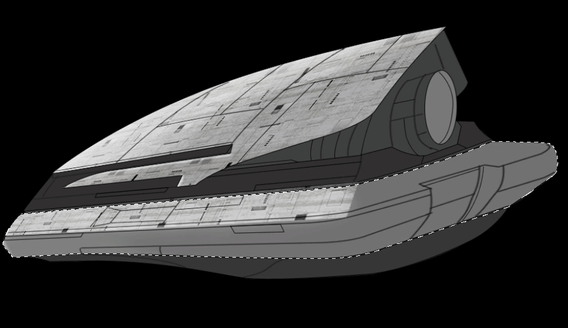
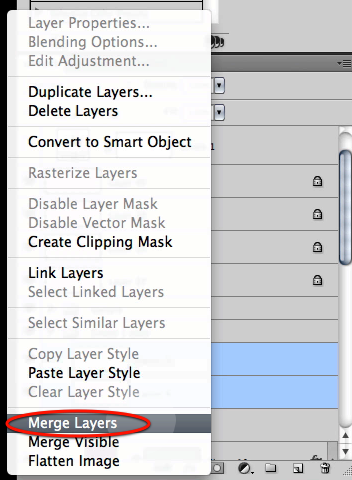
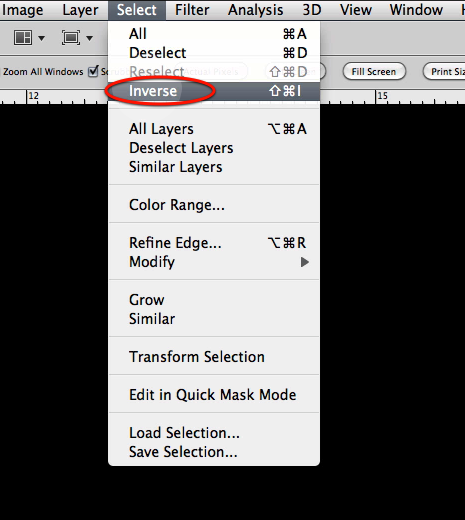
Once again make a quick selection of the selected shape using the thumbnail and then inverse the selection.
Simple enough just delete what is on the inverted selection to get a great texture just for that section.
Now let’s go on to another part of the ship, remember each part of the ship that presents a different perspective will need a separate section of texture to match. So create a new layer and repeat the process, define a rectangular selection of about the section size you need and fill it up with black.
Apply the texture through the layer style pattern overlay option, then create a new layer and merge both to get a usable flat texture.
Then distort the texture into place following our ship perspective and set the layer to overlay.

And once again make a quick selection for the shape we are working in, invert it and delete whatever its outside.
Now there will be sections that our quick selection method cant help us with, and for that we will simply erase what we need, so grab a defined sharp brush for your eraser tool making sure its small enough to erase whatever section you will eliminate as shown below.
And wherever we need another perspective we will eliminate those sections too.
Now let’s continue with some other sections so following the same procedure, make a new layer, drag a rectangular selection that will be enough for the next part of the ship and fill it with black.
Apply the texture, make a new layer and merge them together.
Then use the distort Command/Ctrl to arrange the texture into place and perspective. Then set the layer mode to overlay.
Then use the quick selection method and/or erase what sits outside the intended section.
Now I am sure by now you get the idea of what we are doing, but there is one variant in our ship design, we have darker sections on our design, so let’s se how we will do this. Start with the same procedure, defining a rectangular selection that will be enough or slightly larger than the section you want to cover and make a new layer.
Fill it with black and apply the pattern overlay as before.
OK so far it is the same steps, create a new layer, merge the two together and use the distort Command/Ctrl to set the texture section into place.
Set the layer mode to overlay and erase whatever sits outside the selected part of the ship.

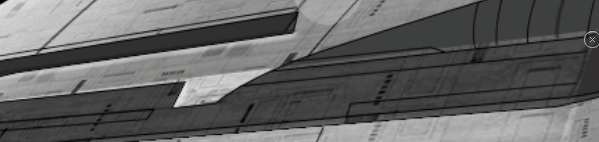
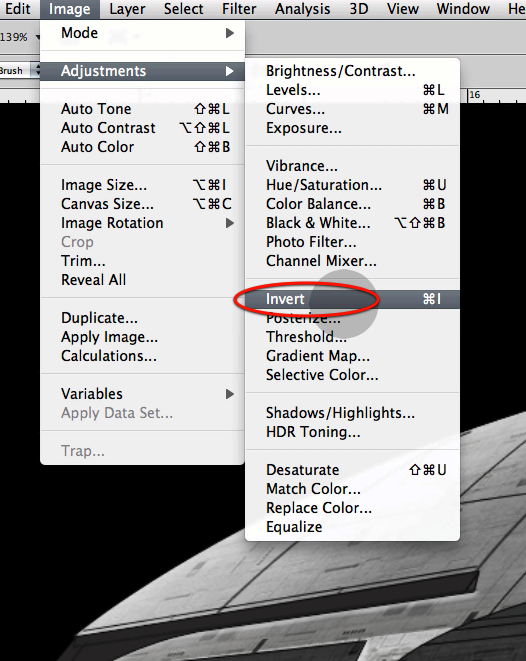
OK now here is the only difference, we will use the image adjustments invert Command/Ctrl, to make this dark sections appear different.
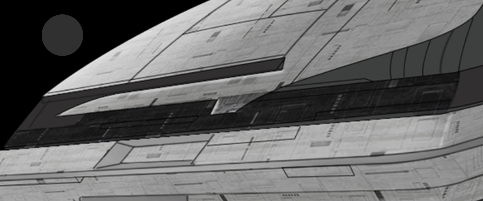
OK I’m sure you can go on repeating this process until you have everything covered with our nice hull texture, once you are finished group all the texture layers and name the group accordingly.

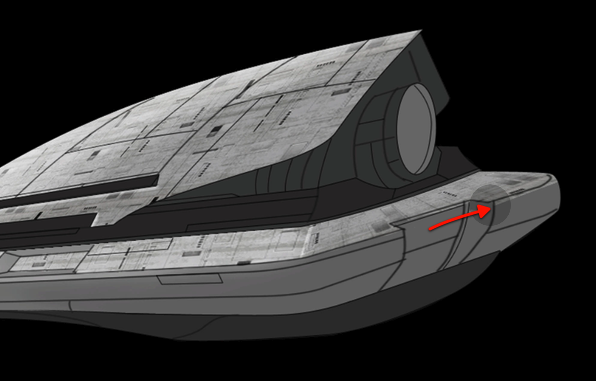
OK now we will add some more details to other sections of the ship that do not require the same texture; let’s start with this section here, so grab the pen tool and make sure the settings in the tool bar are as shown below.
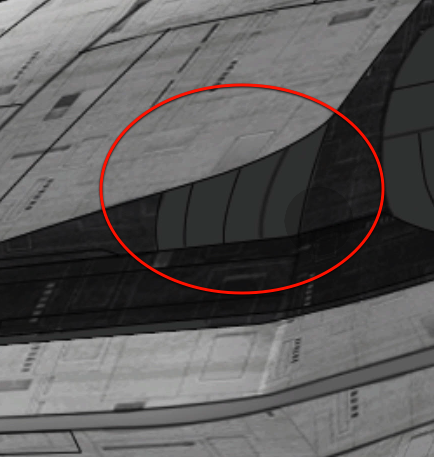

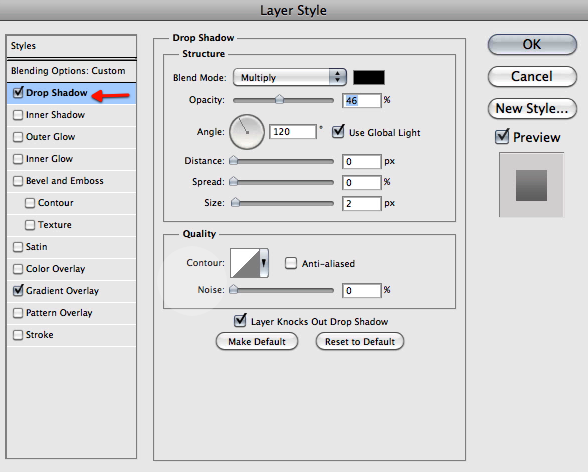
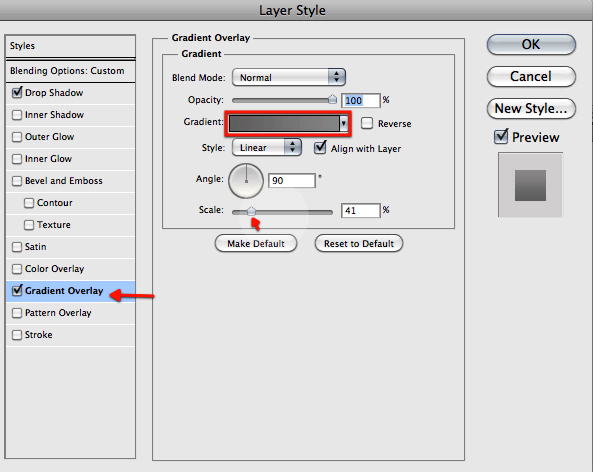
Then define a shape as shown here and setup the layer style as shown below more or less, it doesn’t matter that much because we will be modifying each section later, yet its nice to get an idea of the look of this sections.
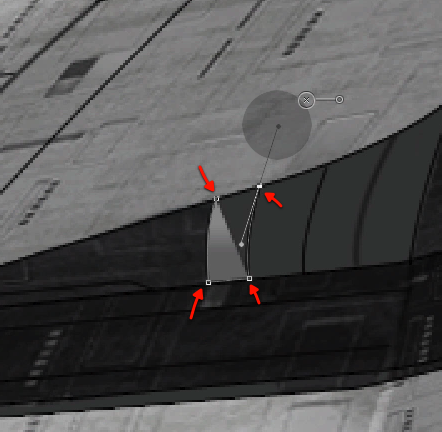
Make one shape for each panel so you end up with something like this.
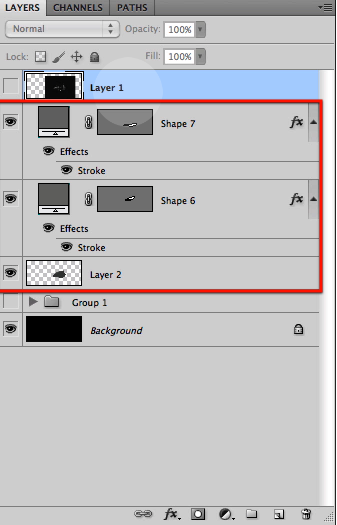
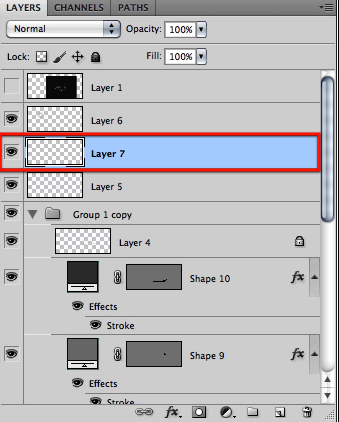
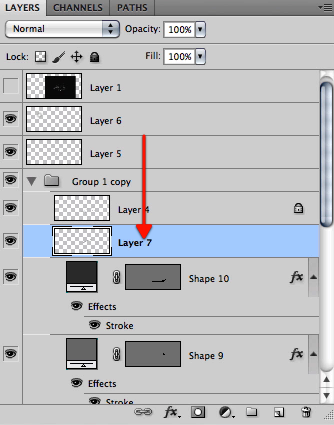
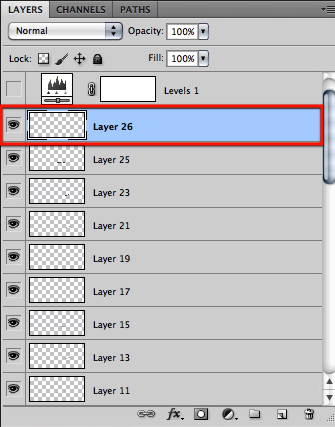
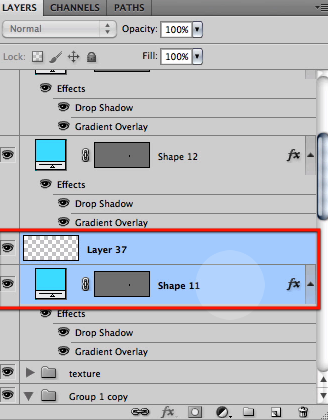
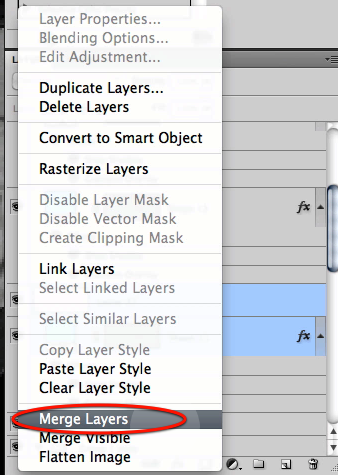
Now once again we have shapes with layer styles that we need to flatten so we can work with them, so select the first shape layer and create a new layer on top of it. Then merge both of the layers.
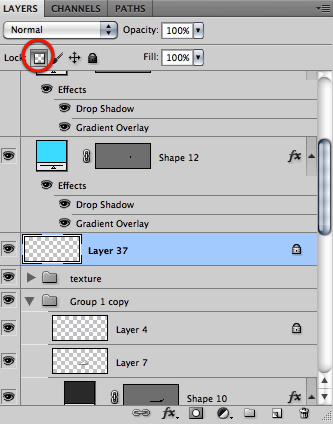
Once you have the layers merged lock the pixels on the layer as shown here.
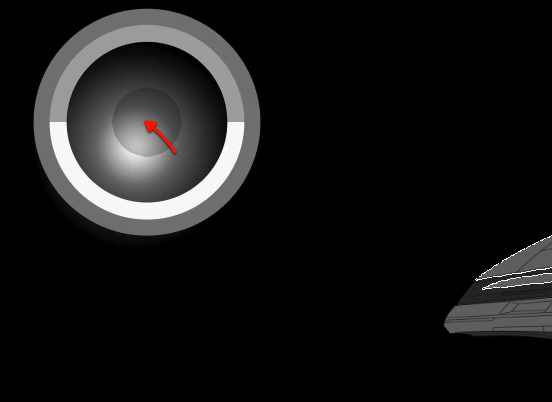
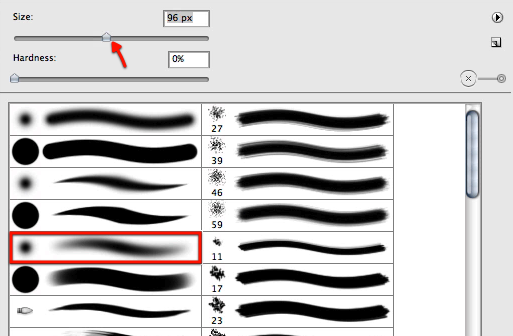
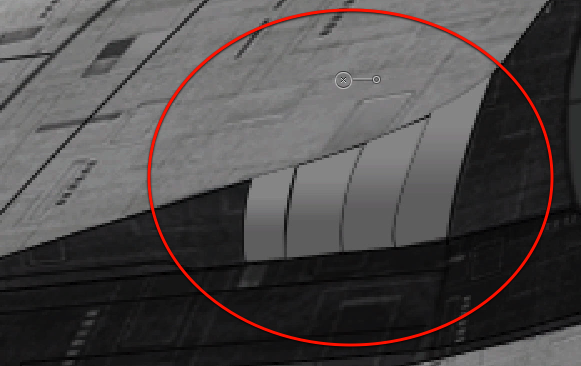
Now with a soft brush such as this one, paint in a shadow with black as shown below.

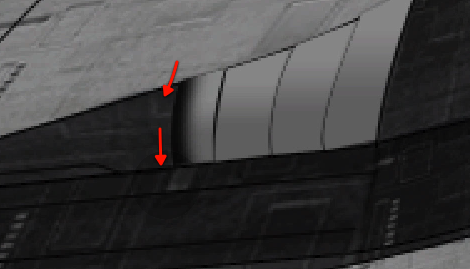
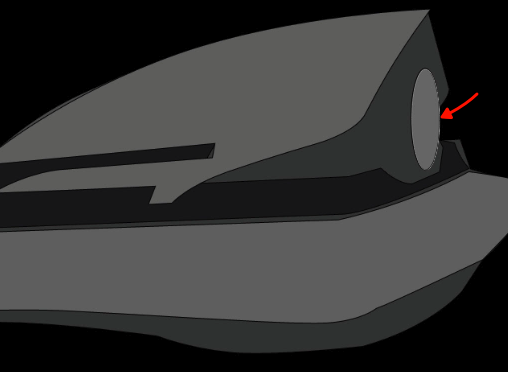
Now with to a bright blue color and reduce the brush size just a bit to paint a glow that comes from inside the ship.

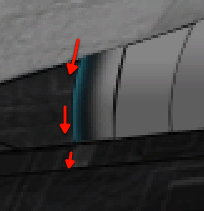
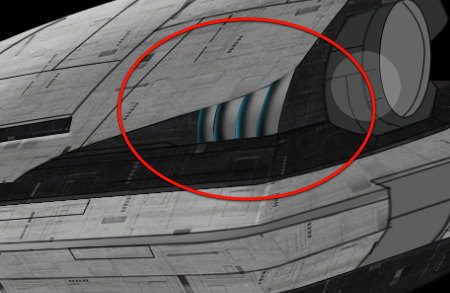
Easy enough repeat the same for each panel so you get something like this.
Now let’s find the line layers we did in the first part of this tutorial shown here.
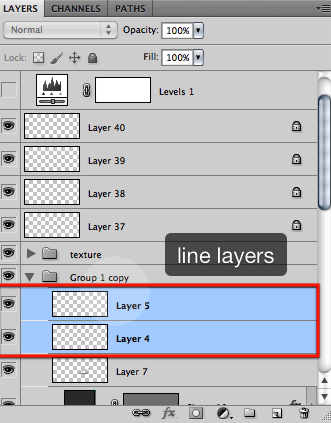
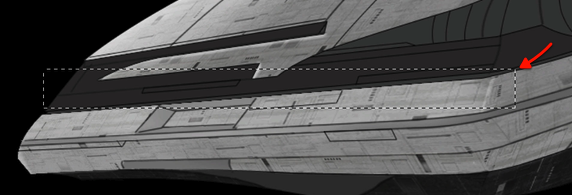
We need to make these lines less defined and apparent and blend them a bit with the rest of the hull; so select them both and merge them. Then do a quick selection of the resulting layer as you already know how.
Great now that we have the lines selected we just need to invert the selection.
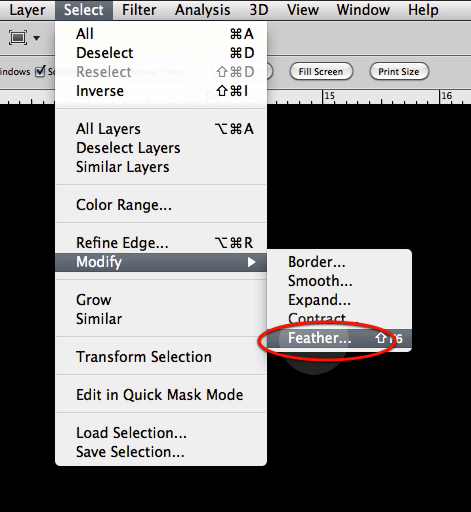
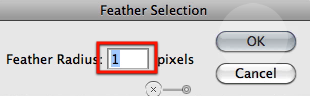
Then use the feather Command/Ctrl as shown so we reduce the definition and with of these lines.
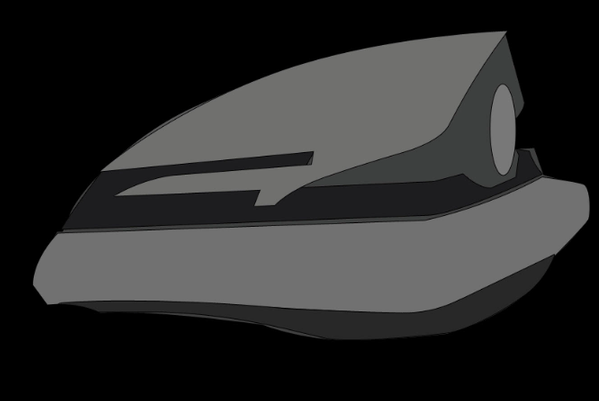
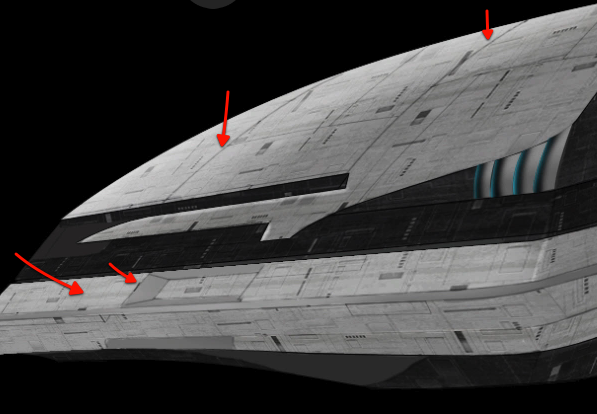
And there we have it a nice fast way of blending this lines into the hull, if there are any sections that still seem to apparent just grab the eraser tool and erase as needed.
Source: http://feedproxy.google.com/~r/psdtuts/~3/xznk7gKWpVY/
case design handyman case design handyman services celtic designs tattoos celtic tattoo designs cheap designer bags cheap designer clothing cheap designer handbags cheap designer jeans cheap designer laptop bags cheap designer messenger bags
I’m very glad to visit our informational post. about Lip Gloss Boxes Wholesale Ideas I appreciate good writing. This is the best way to announce your views to the world.
ReplyDelete