In today’s tutorial, we will demonstrate how to create elegant, glassy, 3D typography using Photoshop and Illustrator. For this project, I used my company logo. Feel free to apply this effect to any logo, text, or shape. Let’s get started!
Step 1
Open the file "LOGO.fh11" from the download file with Illustrator or open your own. Import page: 1 of 1, color mode: RGB.

Step 2
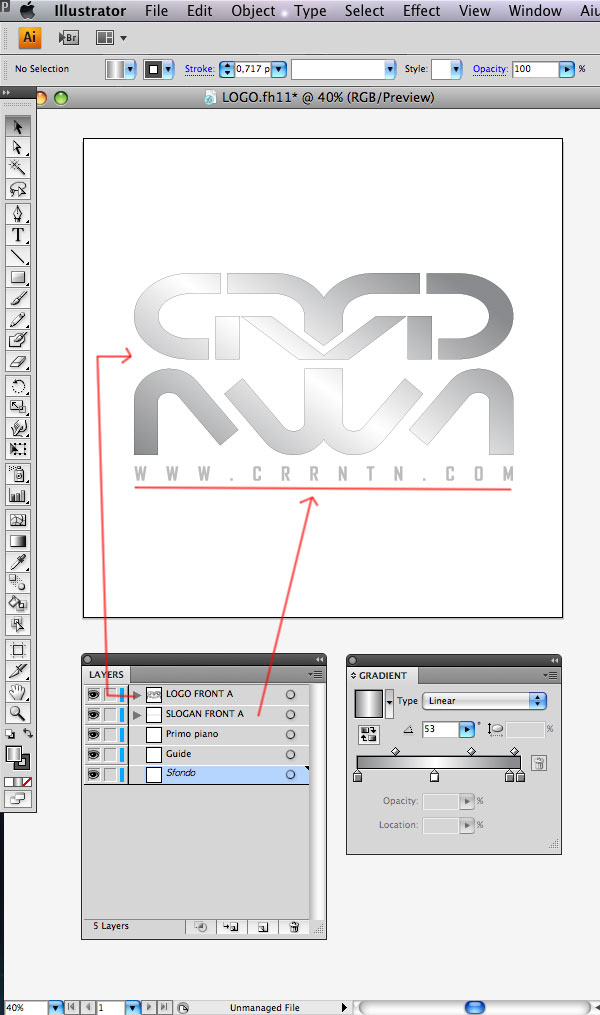
As you can see I have imported my logo, with a previous gradient grayscale already applied. You can set up a similar gradient using the settings below.

Step 3
It is very important not to forget to use the Layer panel. We have included the logo on the "LOGO FRONT A" and the slogan to "SLOGAN FRONT A".
Step 4
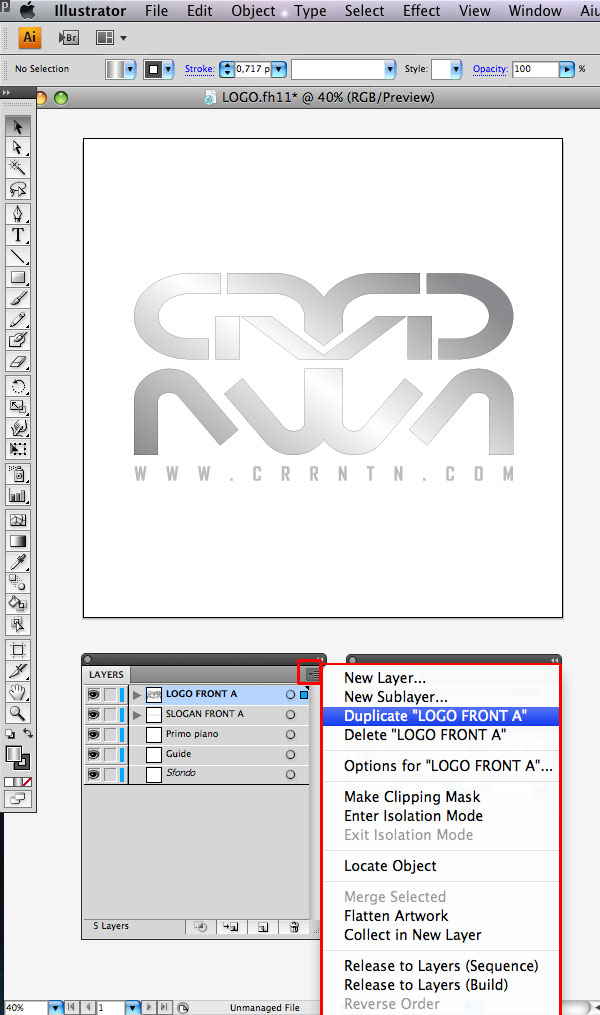
Insert 2 new layers, through the layer panel > duplicate, and rename them to "LOGO FRONT B"
and "SLOGAN FRONT B".
Step 5
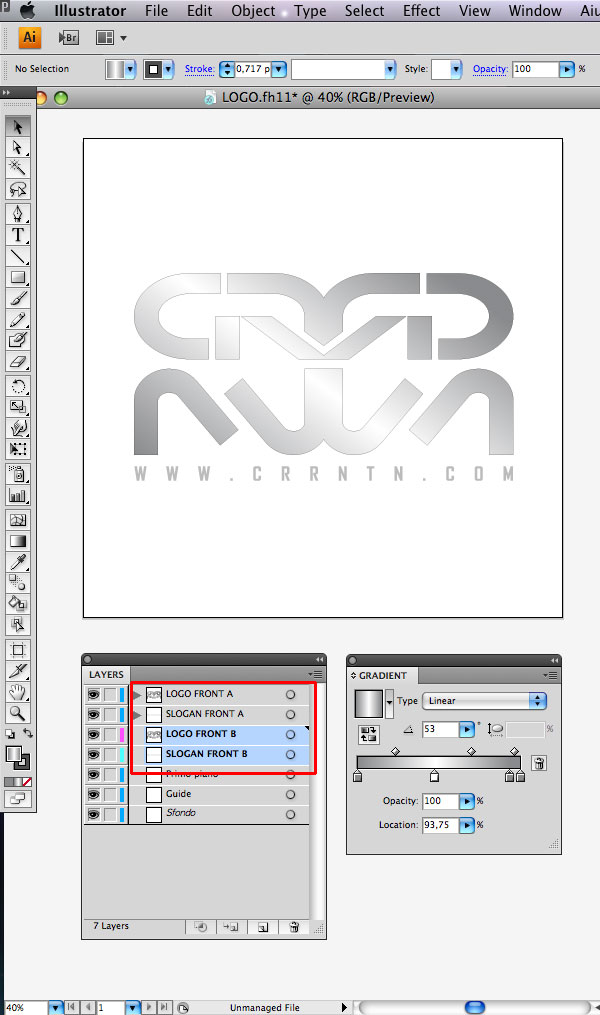
Duplicate the logo and slogan. To insert the two duplicate items in the new layer, just select the duplicated item and click the new layer created. We place the two new layers in the layer panel and drag them below the layer "FRONT A".
Step 6
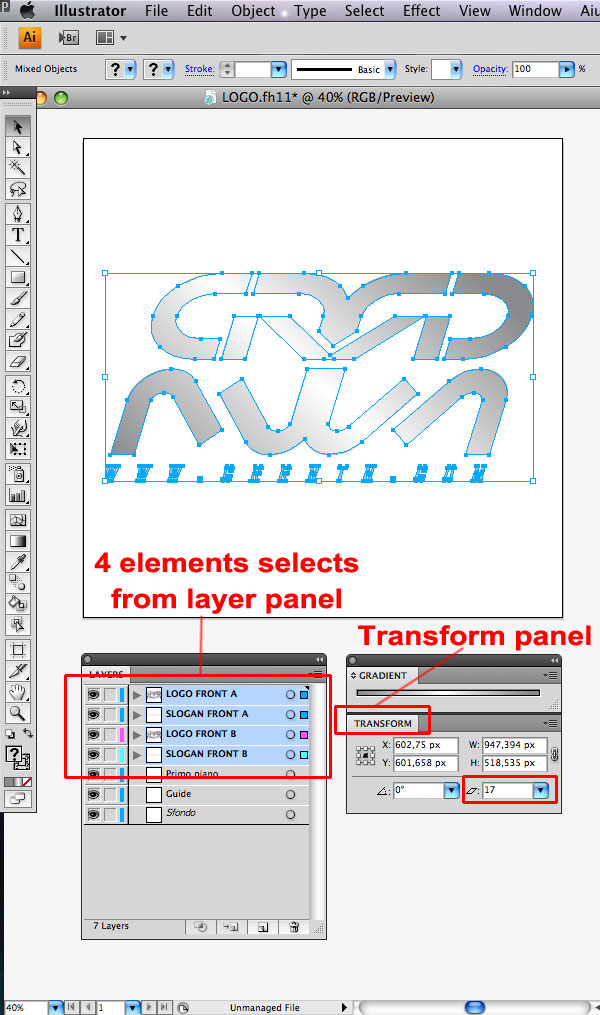
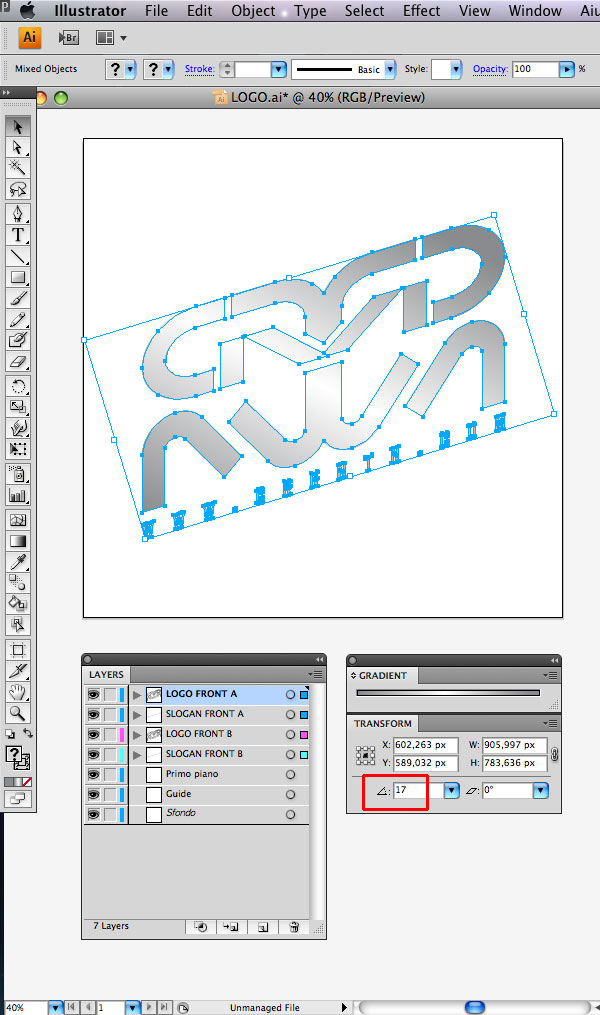
Open the Transform panel. Select all the 4 elements and apply a distortion of 17 degrees.
Step 7
Next, apply a rotation of 17 degrees.
Step 8
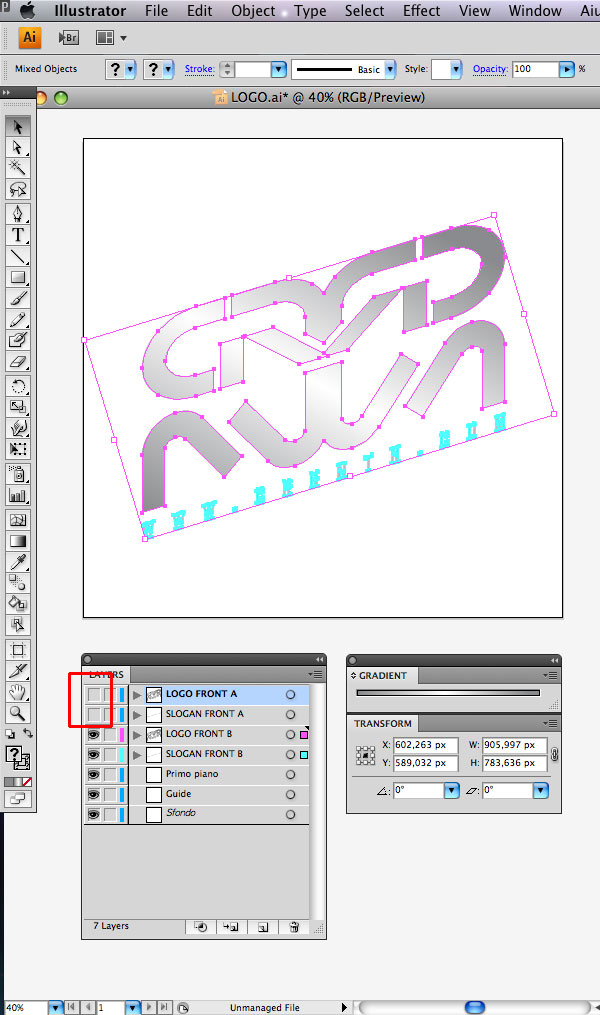
Hide the layers "FRONT A", from the layer panel.
Step 9
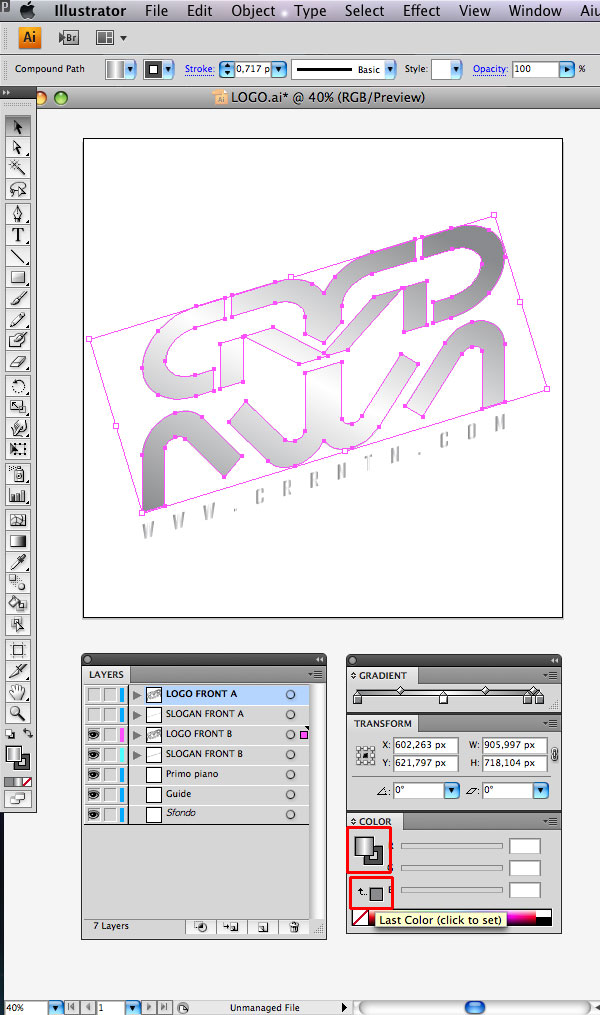
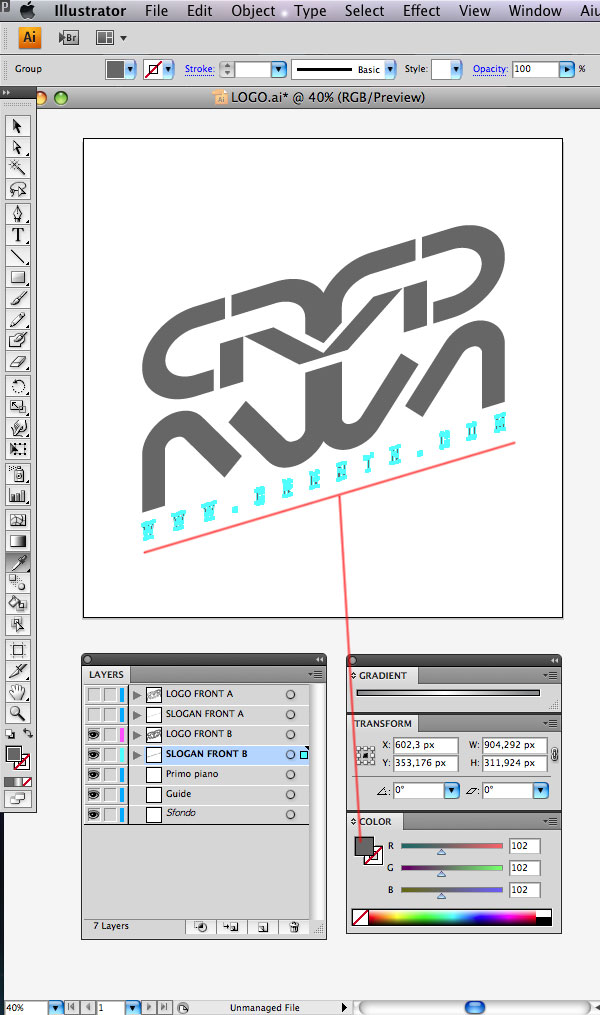
Select LOGO FRONT B and change the fill from gradient to solid color.
Step 10
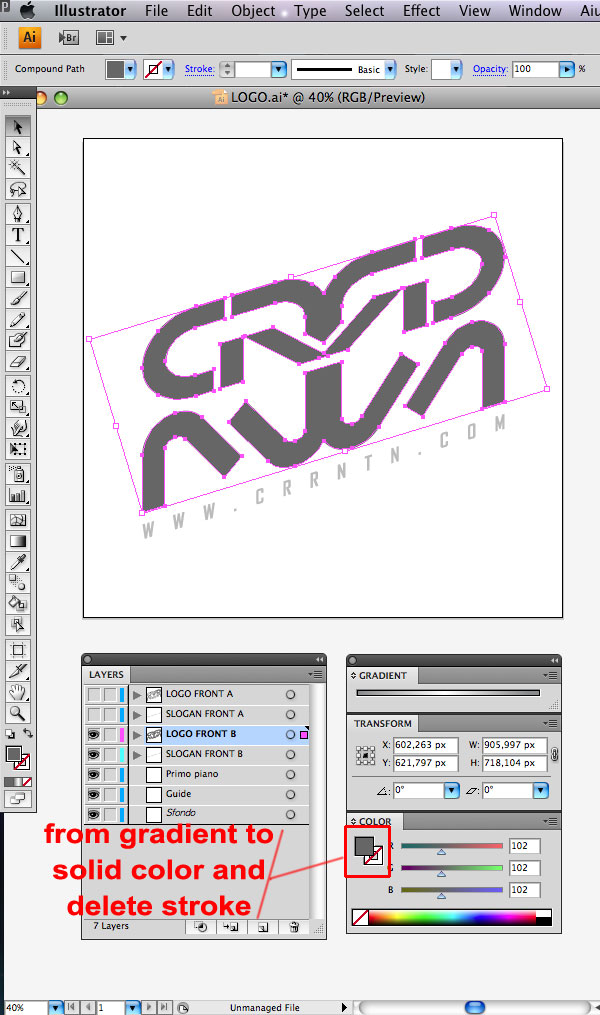
Delete the stroke by clicking the stroke icon.
Step 11
Apply a solid color, for the layer SLOGAN FRONT B.
Step 12
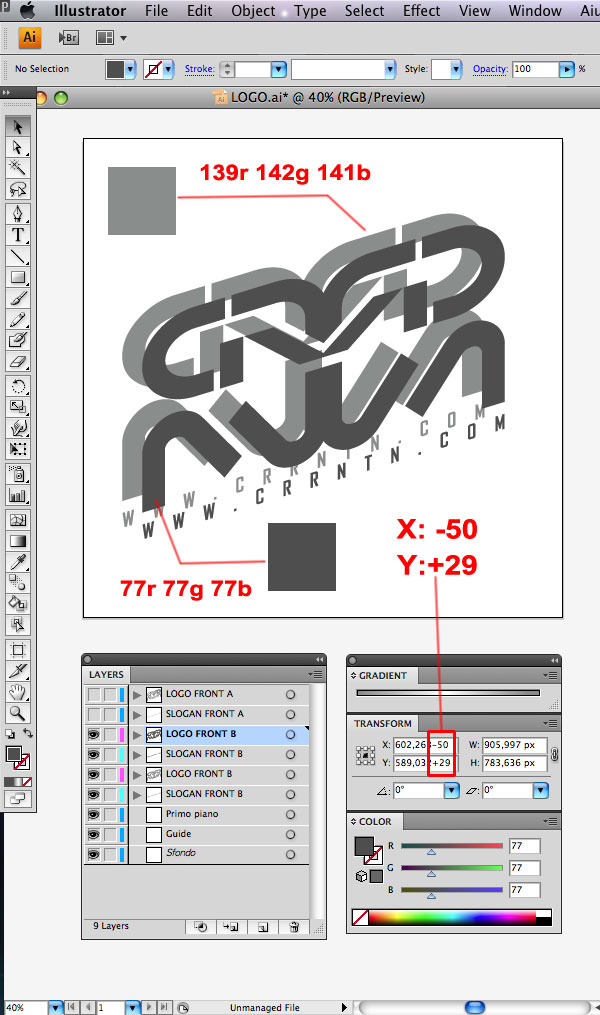
Select LOGO FRONT B and SLOGAN FRONT B, assign the two elements, the RGB color: 77-77-77 Duplicate items and move them using the Transform panel with following settings: X: 50, Y: +29 after that, apply the RGB color: 139-142-141.
Step 13
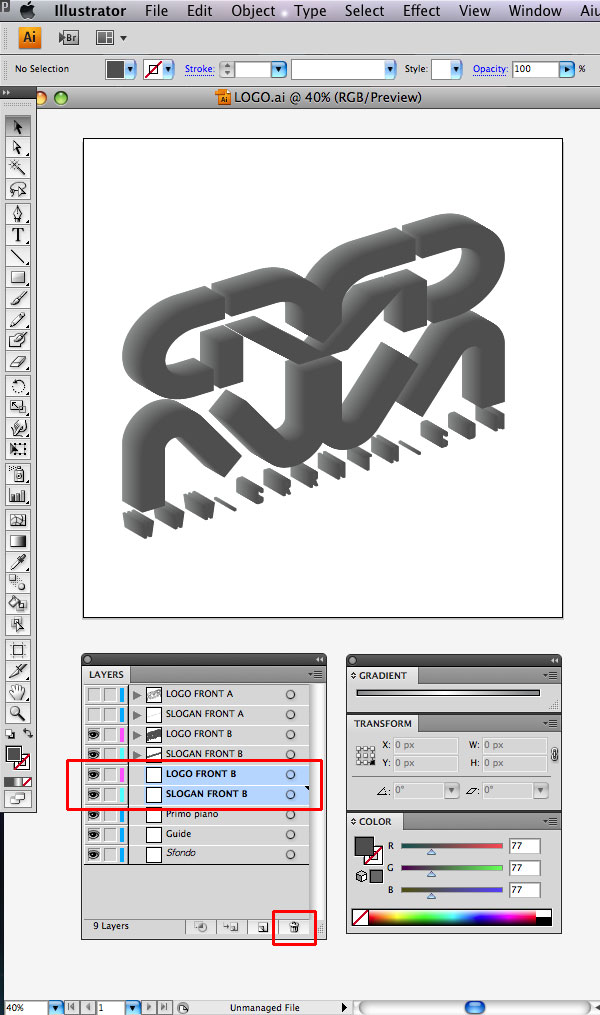
In this step, apply a blend as shown. To do this, set the blend options: Object > Blend > Blend Options, specified step value: 50. And after, we select the two logos and apply a blend effect by clicking on the Object > Blend > Make. Next, we must also apply the blend effect on the slogan.

Step 14
After creating the blend, delete the duplicated layers.
Step 15
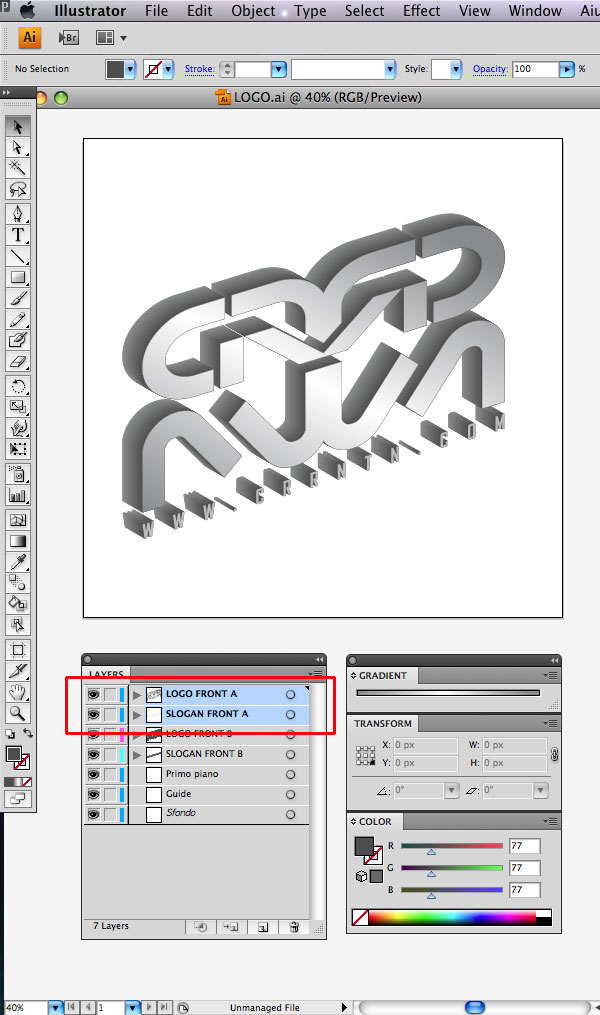
Reactivate the two layers "LOGO FRONT A and SLOGAN FRONT A, and prepare everything, to create the file for Photoshop.
Step 16
Select one by one all the elements of the scene in the order of the layers, cut them and paste them into a new Photoshop document of 1200x1200px, remember to rename the layer pasted to Photoshop, with the same name given to Illustrator. The procedure is very simple, requires very few minutes, all the individual levels can be pasted or as Smart Objects or raster image.
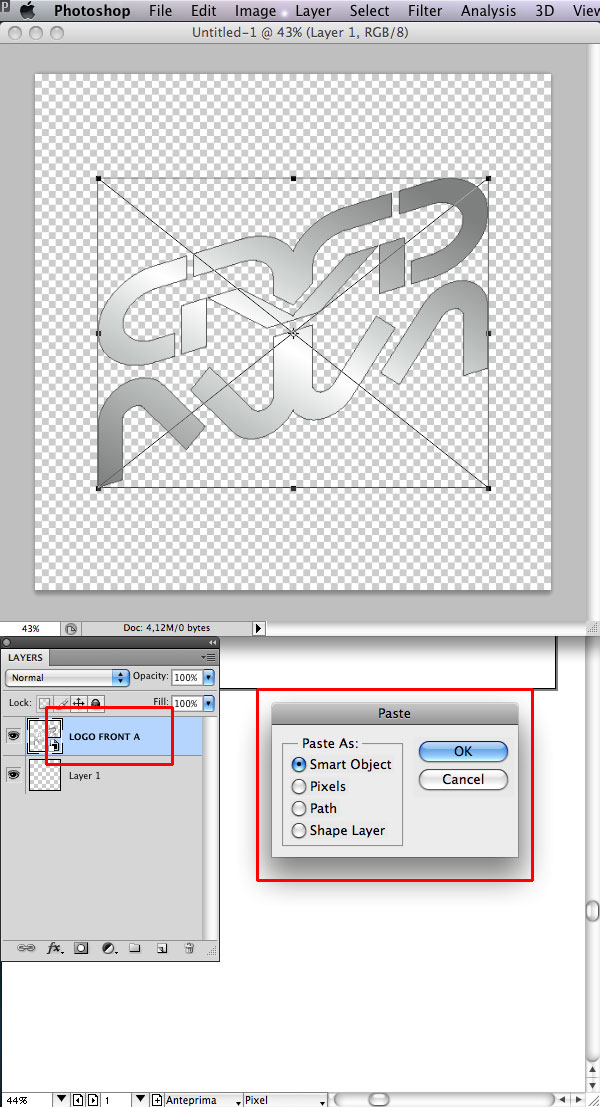
Step 17
Once you have pasted all the individual layers, copy and paste all the layers that make up the logo in Illustartor together, rename "RIF". Place this layer below all other levels. This special layer will serve as reference to properly align the individual components imported separately above.
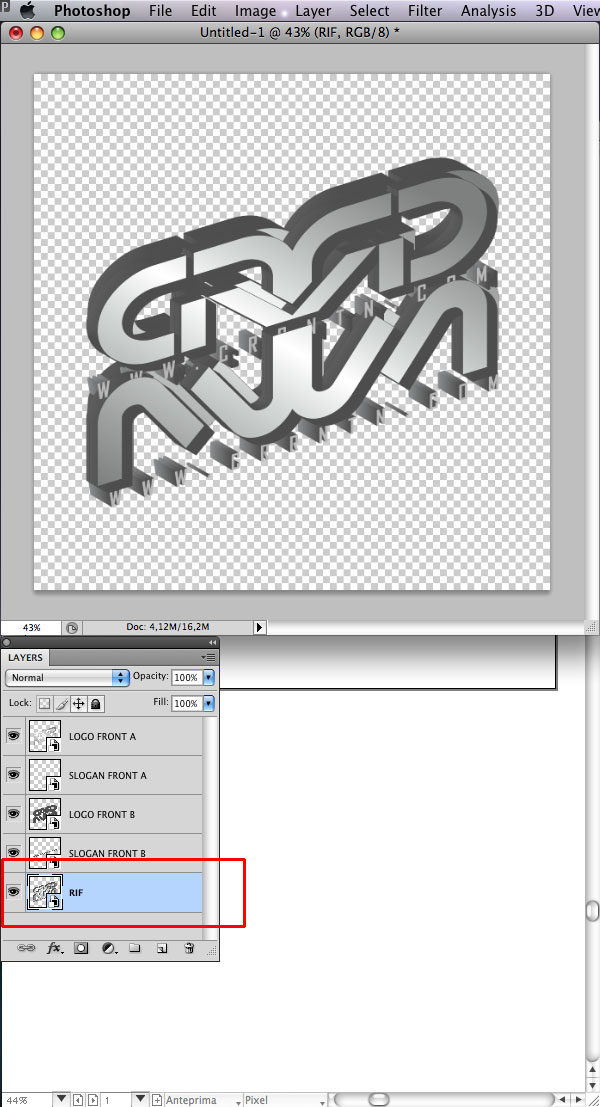
Step 18
To make this task easier, activate the snap to View > Snap and position the layers one by one.
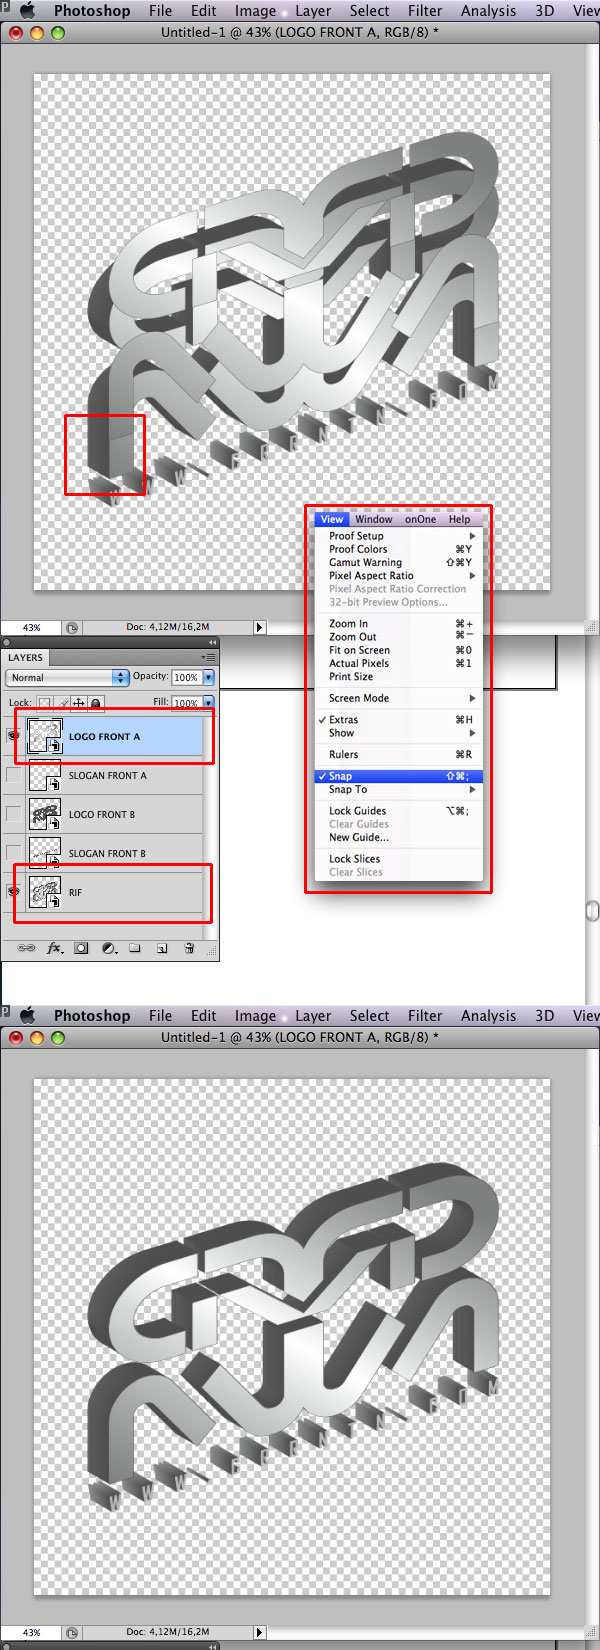
Step 19
Once this has been completed, clear the layer RIF, and proceed with the reflected part of the logo.
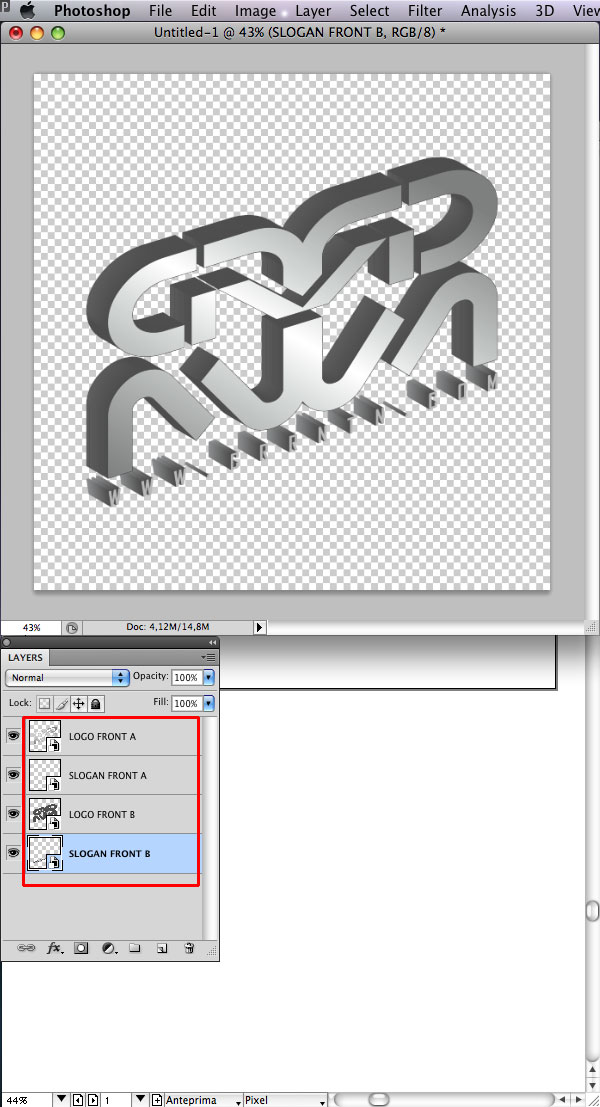
Step 20
To create the reflected part of the logo, we open, in Illustrator, the file
"LOGO REFLECTED.fh11"
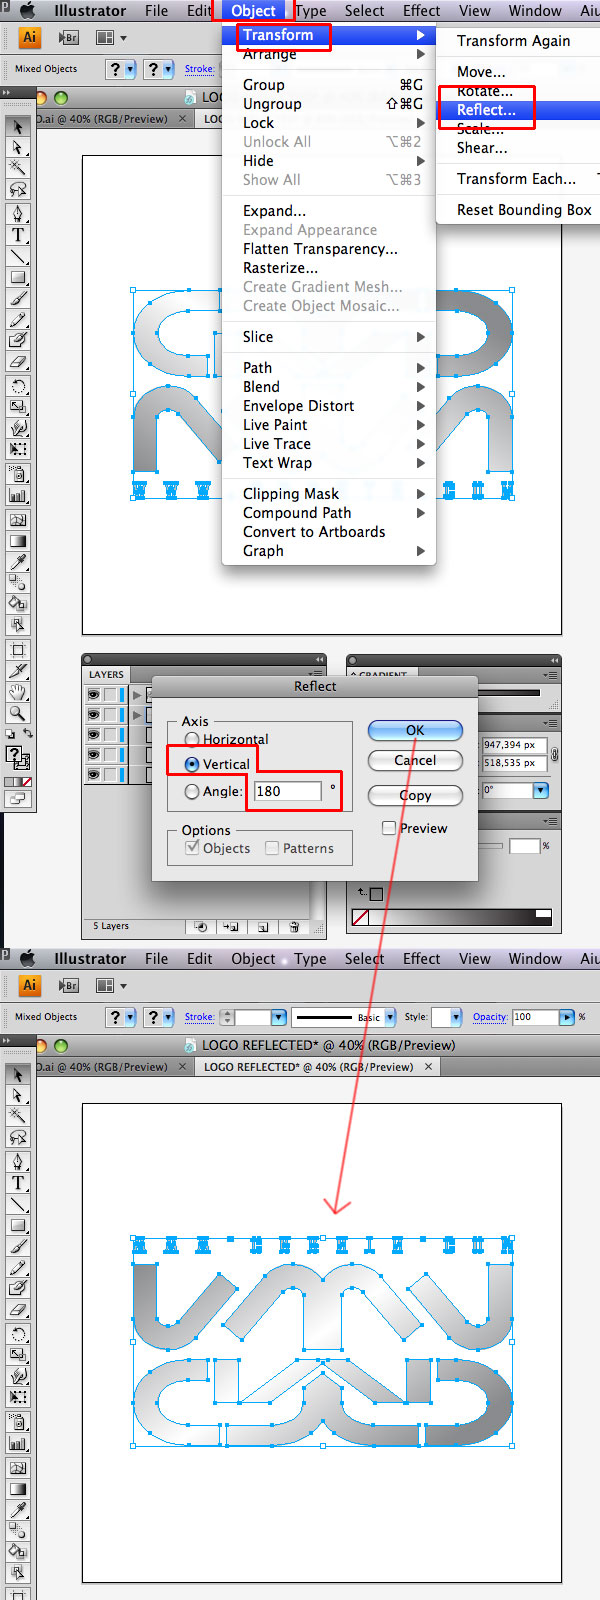
Reflecting the logo using the Object > Transform > Reflect by inserting vertical value 180 °.
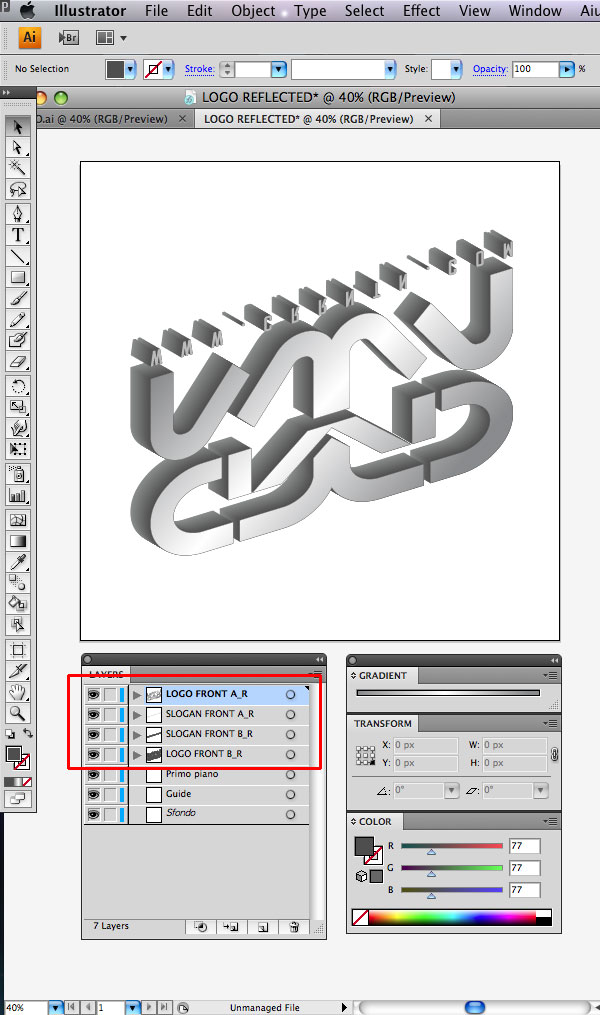
Rename layers (LOGO FRONT A_R – SLOGAN FRONT A_R) and
(LOGO FRONT B_R – SLOGAN FRONT B_R)
We repeat all the steps made from 1 to 19, to obtain the reflected part of the logo in Photoshop.
Step 21
Once you have completed all the steps above, your image should look similar to the image below. Make sure your layers look similar to below.
Step 22
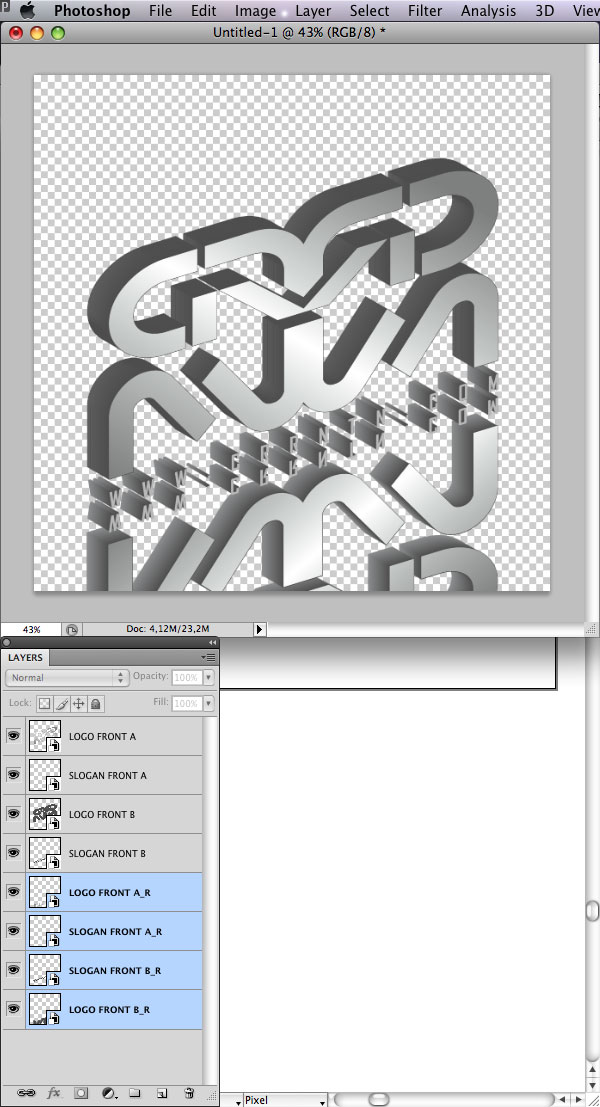
Drag the layers of the reflected part of the logo and place them below the logo. Place the mirror part in the scene correctly with the move tool.
Step 23
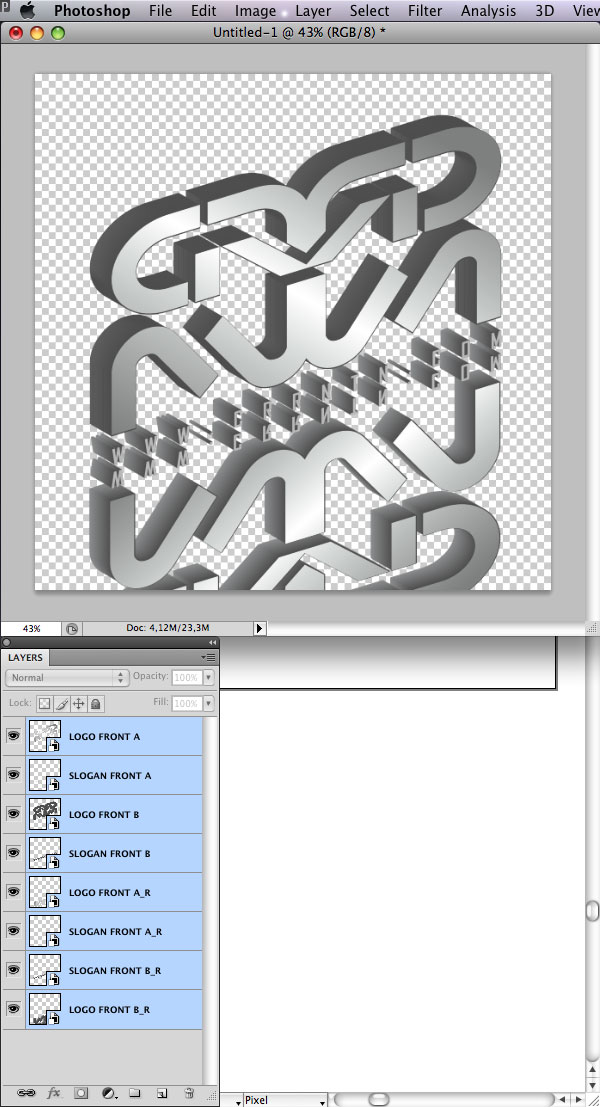
Center all the elements in your scene.
Step 24
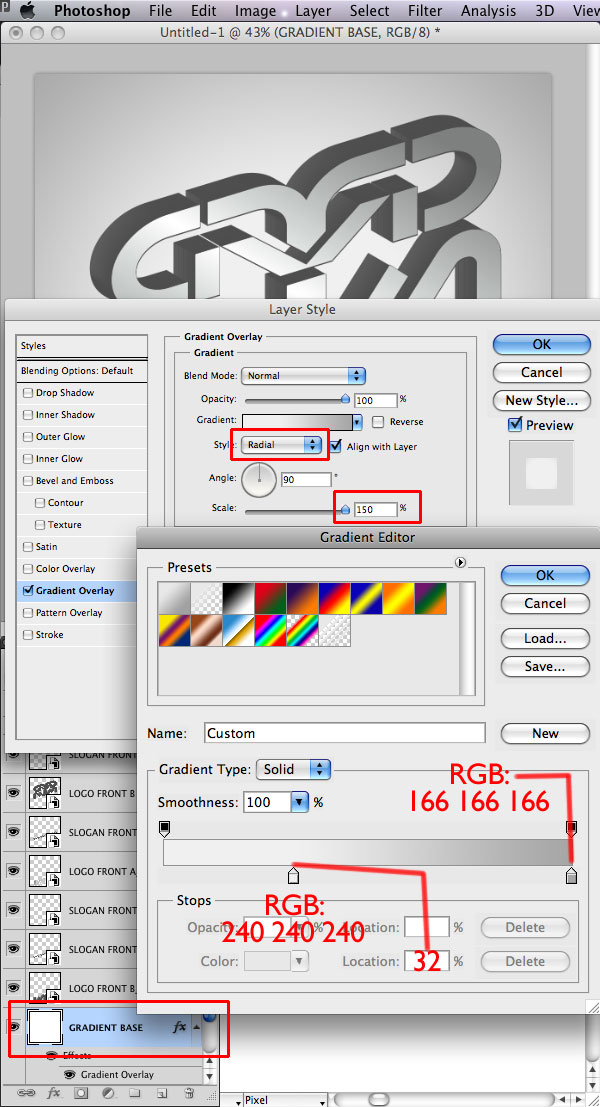
Create a new layer by going to Layer > New Layer, rename it "GRADIENT BASE" apply a fill white color and apply a radial gradient using a layer style, the parameters are below.
Step 25
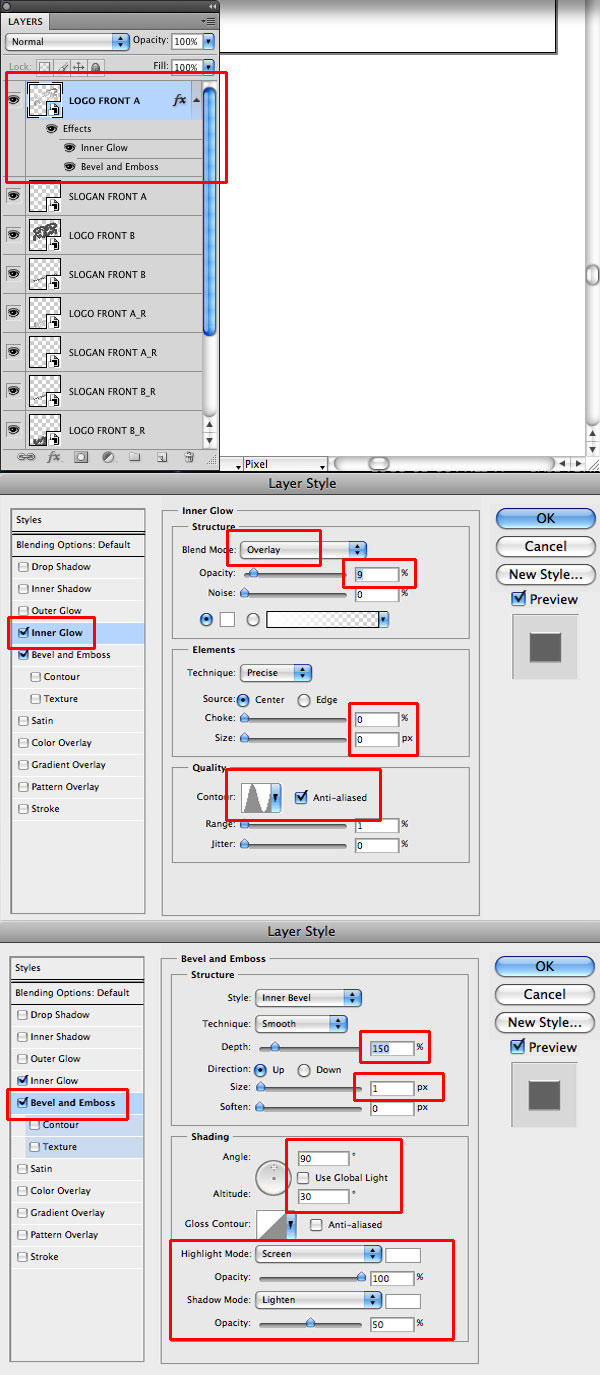
Give LOGO FRONT A a layer style with Inner Glow + Bevel and Emboss.
Step 26
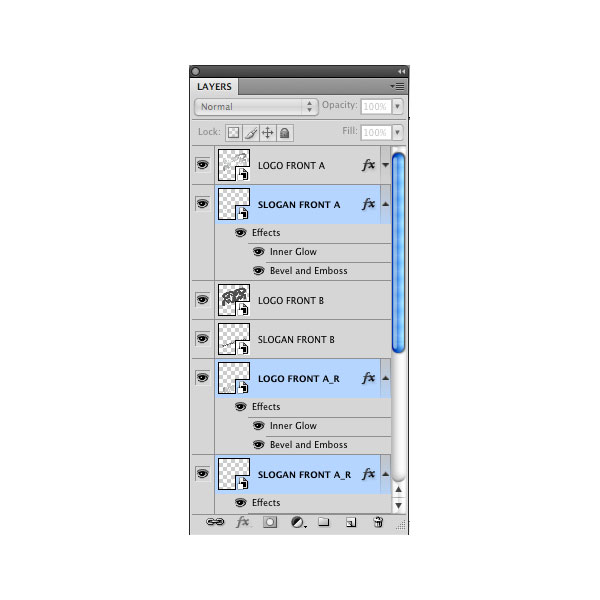
Copy the layer style you just created and paste it to:
SLOGAN FRONT A
LOGO FRONT A_R
SLOGAN FRONT A_R
Step 27
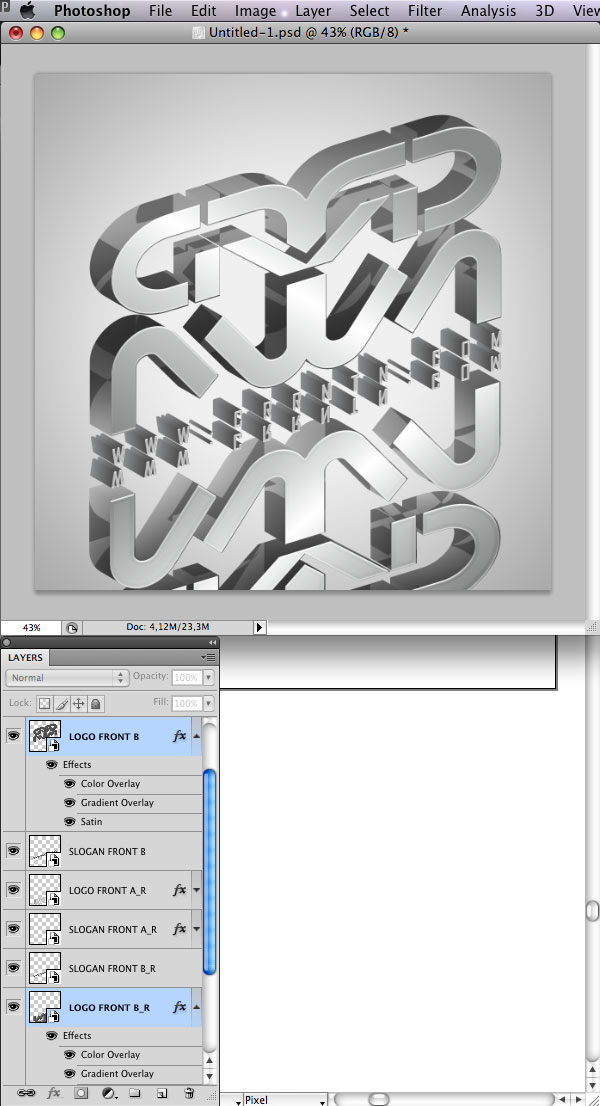
Give LOGO FRONT B, a layer style with these parameters.

Step 28
Copy and paste the layer style you just created, on the layer LOGO FRONT B_R.
Step 29
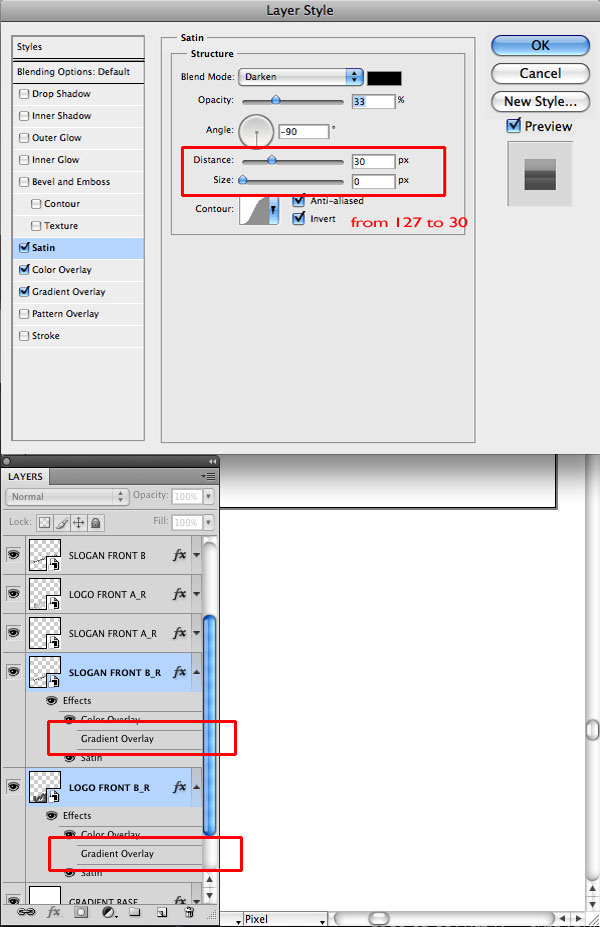
Copy and paste the layer style you just created also on the layer LOGO FRONT B_R and SLOGAN FRONT B_R Only on the level SLOGAN FRONT B, we have to change, in the panel Satin, Distance value from 127 to 30. And disable the Gradient overlay only on SLOGAN FRONT B_R and LOGO FRONT B_R.
Step 30
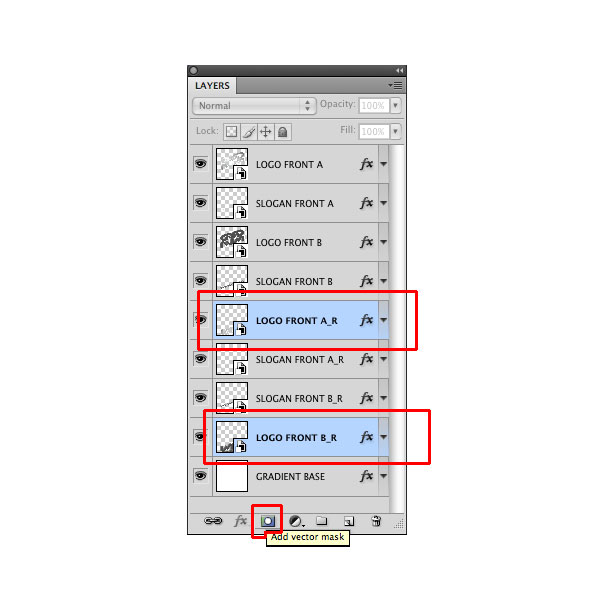
Add a layer mask to the layers LOGO FRONT A_R and LOGO FRONT B_R, by clicking on the
icons add vector mask.
Step 31
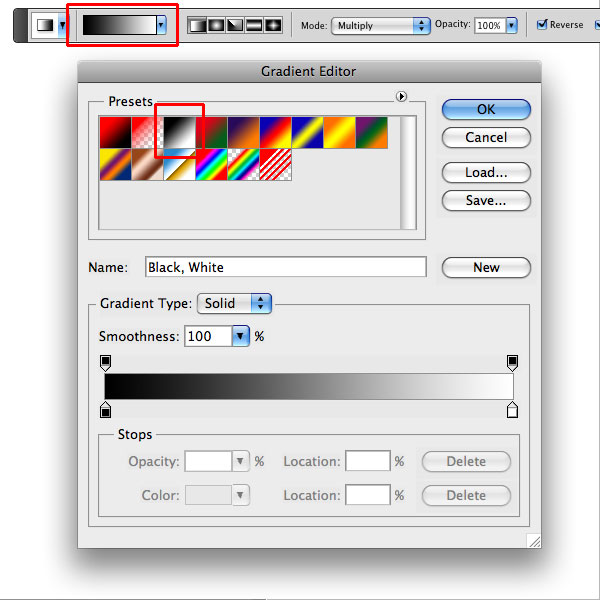
With the Gradient Tool (G) we have to create a gradient on the mask layer with an angle of about 15 degrees. But first, we need to edit the gradient type to use, click on the gradient bar. We will use the classic Black and White, mode Multiply.
Step 32
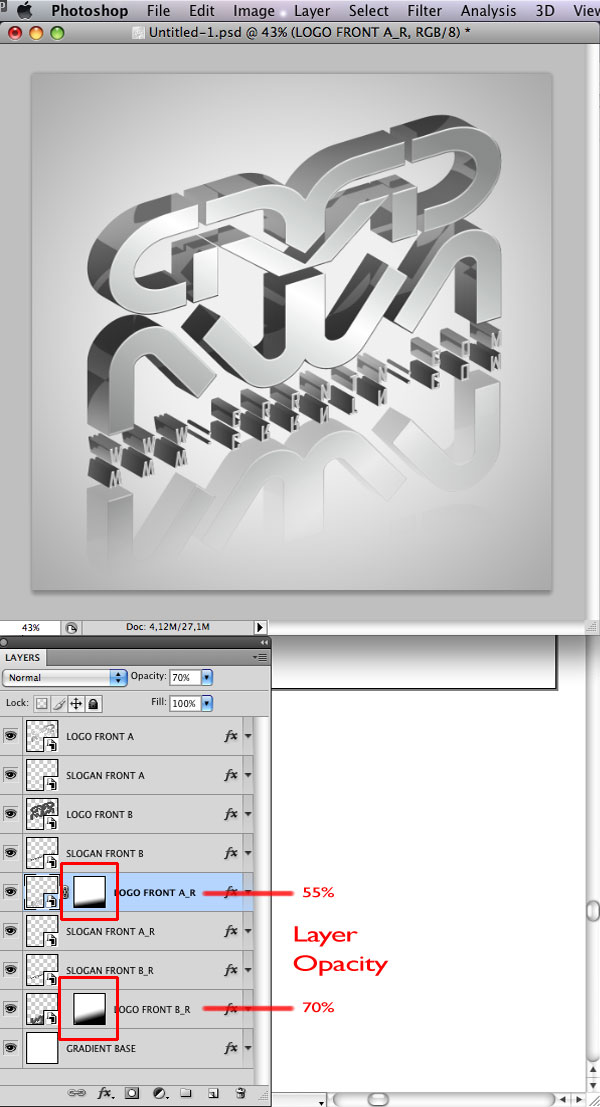
The effect of mask, in the layer LOGO FRONT B_R must be stronger, compared to the mask LOGO FRONT A_R. Because the first, better hides the darker parts, while the second shows a bit more reflection of the bright parts of the logo. To improve the outcome of the two layers change the opacity to 55% and 70%.
Step 33
We set the opacity in the layer SLOGAN FRONT B_R to 40%, and level SLOGAN FRONT A_R
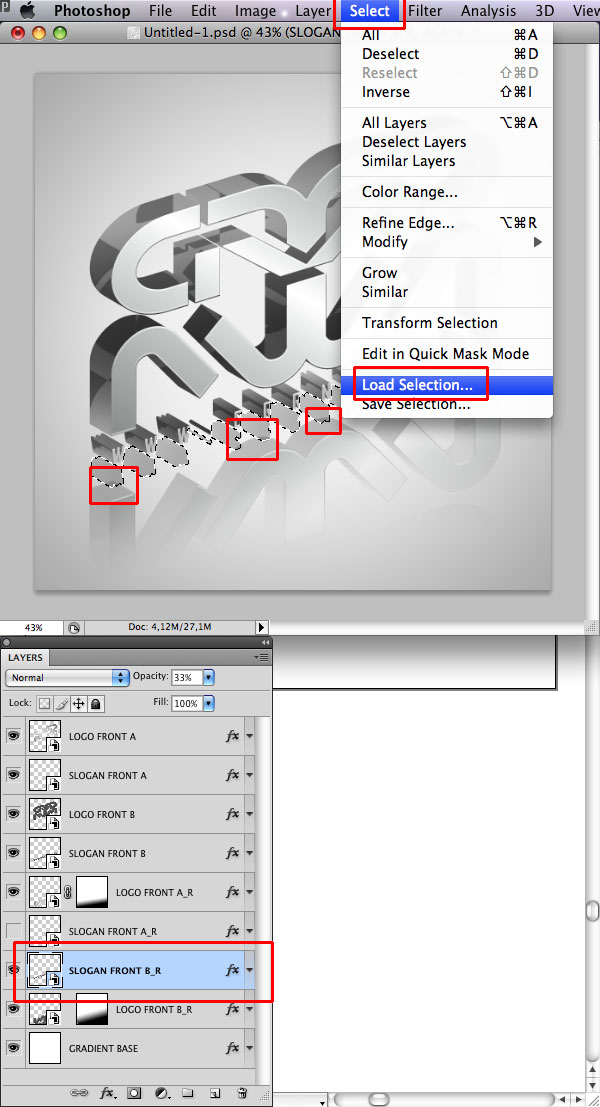
to 75%. To resolve the overlap transparency, between SLOGAN B_R FRONT and
LOGO FRONT B_R, select the layer SLOGAN FRONT B_R activate the selection by
Select > Load Selection, and let Ok.
Step 34
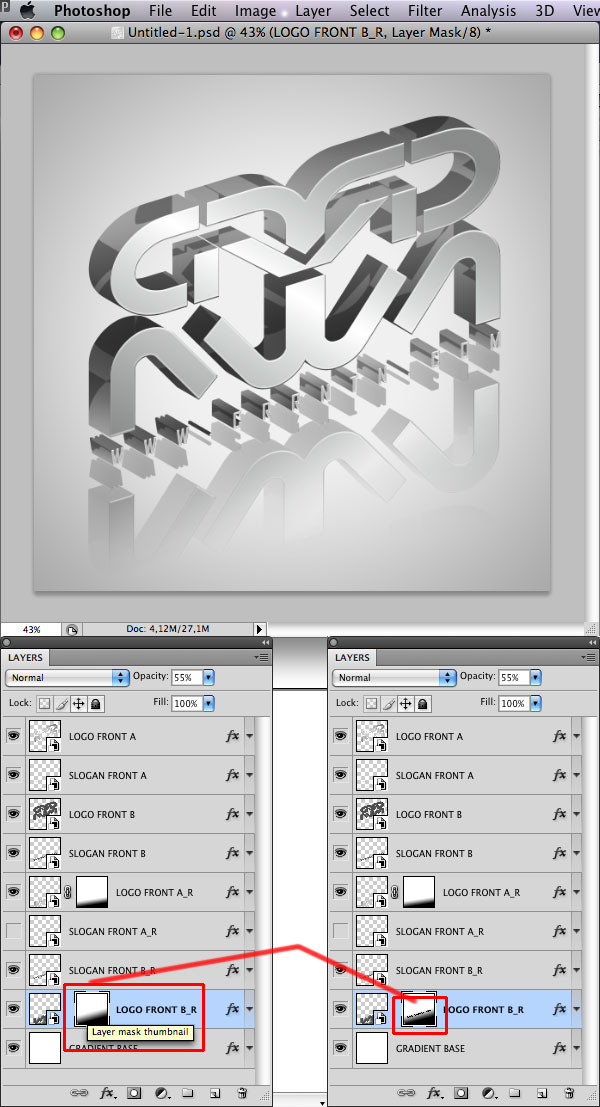
Select the layer mask of LOGO FRONT B_R and apply a color fill black.
Step 35
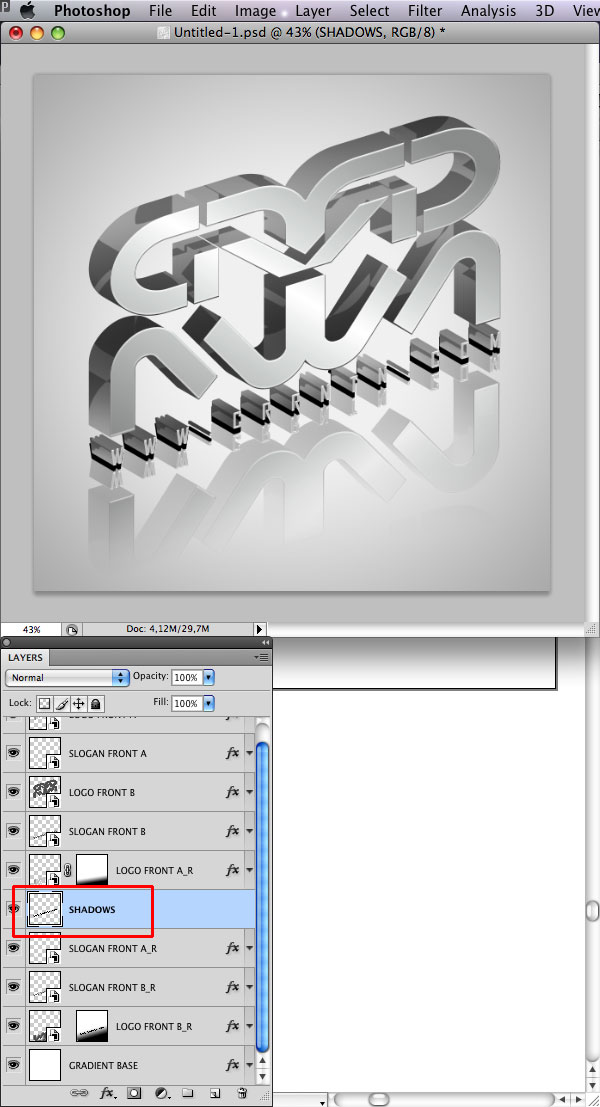
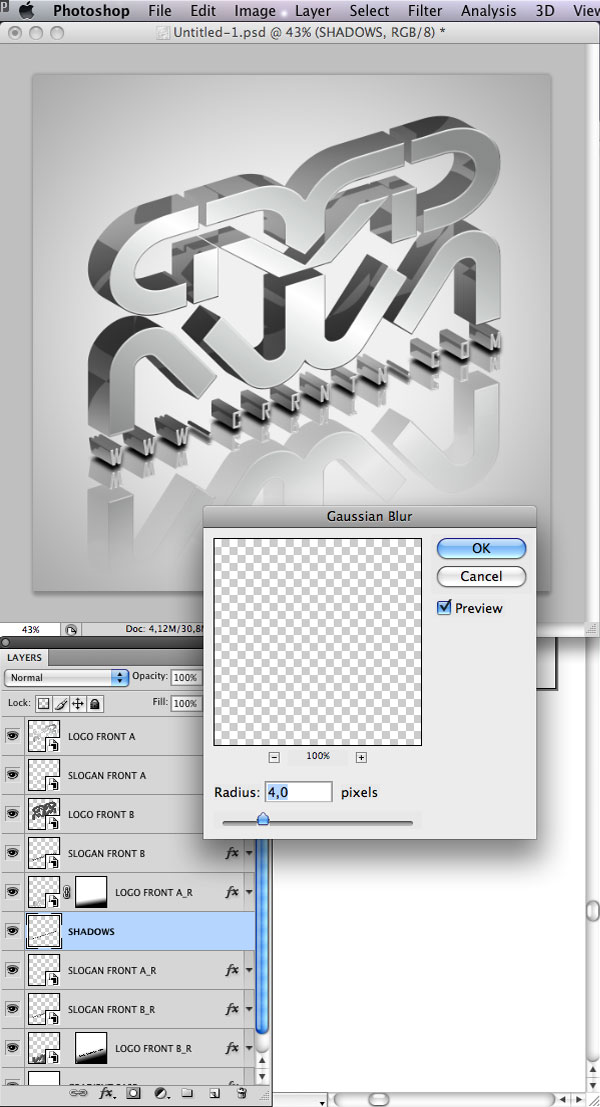
To create the shadow, load the selection of the layer SLOGAN FRONT B by Select > Selection, create a new layer by Layer > new layer, and rename it "SHADOWS". Color your selection black. The shadows layer created are positioned between LOGO FRONT A_R and SLOGAN FRONT A_R, with the move tool, go down a bit to make it visible.
Step 36
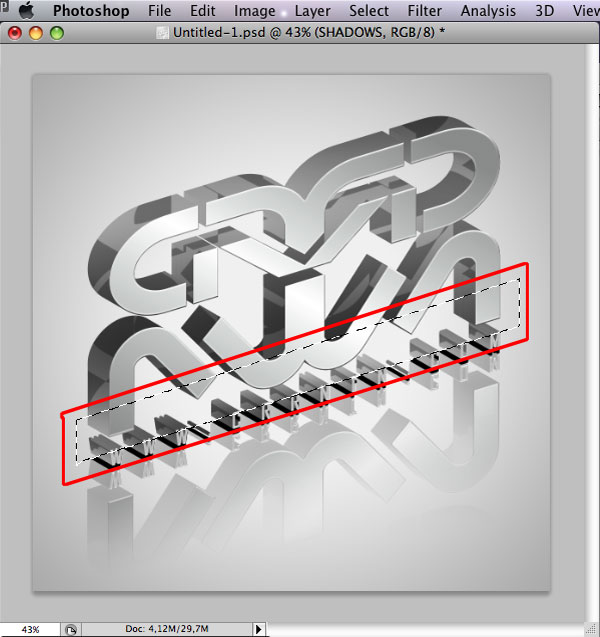
Create a selection using the Lasso tool, with the angle of inclination of the logo,
after this step erase the shadow that is not needed.
Step 37
Apply a Gaussian Blur effect with a Radius value of 4 pixels.
Step 38
Change the opacity of this layer to 75%.
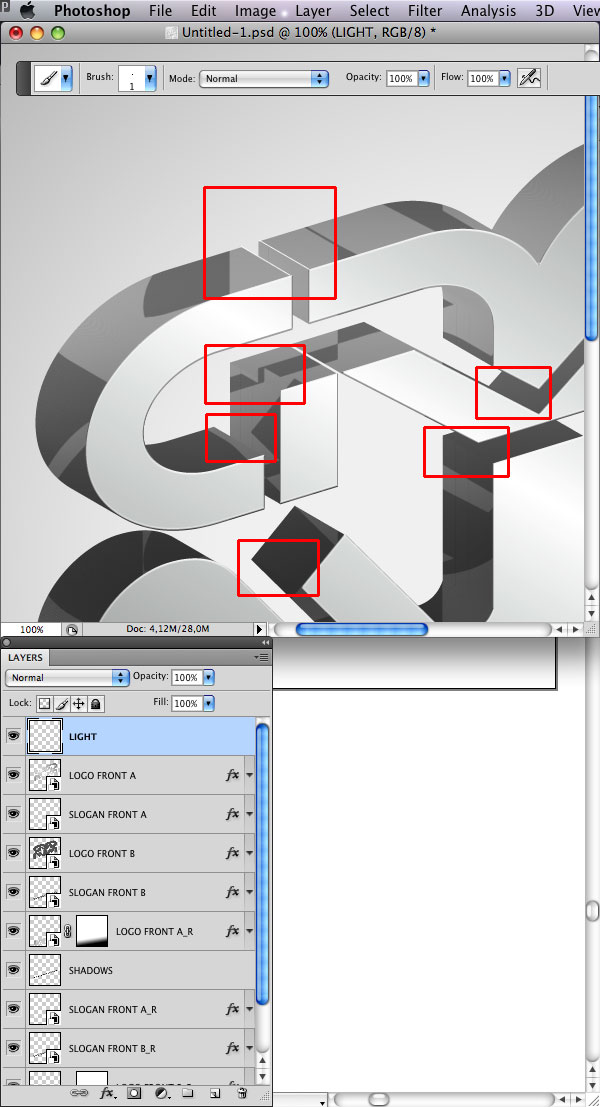
Now we just have to create a new layer, rename it the "LIGHT", Place it on all layers.
We take a brush tool with 1 pixel radius, draw with the help of the shift key, well-defined
straight lines in all parts sharp of the logo and slogan text. This step produces a realistic
glass effect to the logo.
Final Image

innovation through design thinking interior design interior design - grundlagen der raumgestaltung interior design bedroom interior design blog
No comments:
Post a Comment